Move
Coordinates for a layer’s destination
In ProtoPie, a Response is an interaction piece that is triggered by a Trigger. It can be described as the action initiated by the trigger to which it is tied.
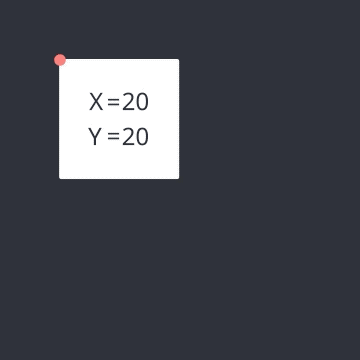
Moving a layer to specific coordinates.
Coordinates for a layer’s destination
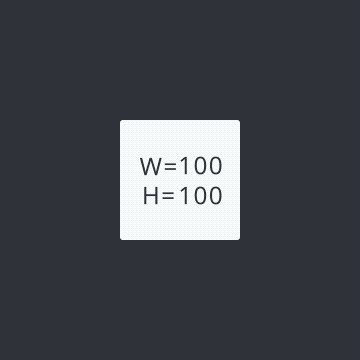
Scaling a layer up or down.
It is possible to modify the size of a layer with fixed values for the width and the height. (When containers are resized, the layers within the container remain unchanged.)
It is possible to modify the size of a layer proportionally by a certain %. (When containers are resized, the layers within the container are also resized.)
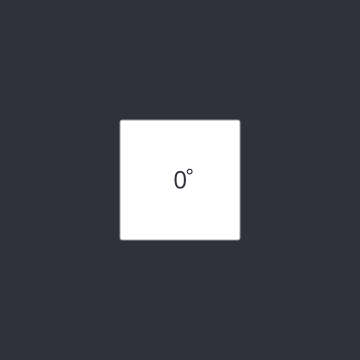
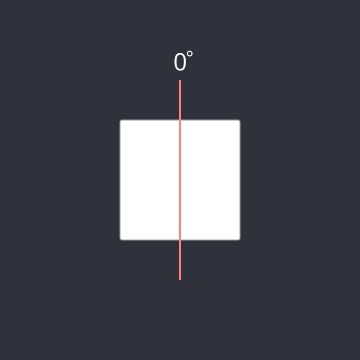
Rotating a layer to specific angles.
The angle a layer rotates to
The amount of rotation a layer rotates by
The area towards which a layer moves
Rotating a layer to specific angles in a three-dimensional field.
The angle a layer rotates to
The amount of rotation a layer rotates by
The area towards which a layer moves
The reference point from which a layer undergoes rotation or resizing
The distance between a layer and a point of focus for viewing
Changing the transparency of a layer.
Changing the layer’s opacity
Changing the color of a layer.
Changing the layer’s color
Changing the layer’s border color
Changing the layer’s shadow color
Changing the radius of individual corners or all corners of a layer.
The value a radius should have.
The amount that needs to be added or subtracted from the current radius.
Adding custom borders to a layer.
Borders can be placed on the inside, center or outside of a layer’s outline

Adding custom shadows to a layer.
Shadows can be customized based on the chosen coordinates and blur
Blurring underneath layers based on specific blur effects.

Changing the order of layers in a stack.
The changes of a layer’s order
Scrolling to a specific position within a container.
The amount a layer scrolls

Going from one scene to another scene.
Use Smart Jump to animate transitions between scenes automatically. Learn more about Smart Jump.
Jump to a certain scene
Transition effects when jumping to a scene
The selected scene will be reset when jumping to it. If this option is not enabled, the scene is left in its last state
Send responses enable device interactions, but they cannot be used independently.
They must be used with Receive triggers. Such actions fire when a prototype with a Receive trigger receives a message sent from a different prototype through the Send response. The received message should always match the sent message.
Sending and receiving messages can be used within the same scene to modularize interactions or reuse a set of responses, avoiding repetitive work.
Inside the component, you can use the Send response to send a message and this can be received by a Receive trigger outside the component. This also works the other way around. Refer to Components for more information.
Select ProtoPie Connect/Studio as a channel to allow interactions among devices (it works the same way for ProtoPie Connect).
To modularize interactions or reuse a set of responses avoiding repetitive work, you can use Receive triggers and Send responses in one scene.
A message is a string that is transmitted. The message in the Receive trigger on one device should match the message in the Send response, only then interactions among devices will take place.
It is possible to send a value together with a message. This value would have to be assigned to a variable upon receiving.

Opening websites or apps through URL schemes.
You can enter website URLs and visit a website in the browser or the in-app browser on iOS.
URL schemes allow you to open system apps and third-party apps on iOS and Android devices. Third-party apps usually have their own defined URL schemes.
You can enter formulas and use the Link response more dynamically.
Changing the content and properties of a text layer. Text responses have no duration.
The text content will be changed to that desired by the user
The text is resized
The text can be made bolder or lighter
The text’s horizontal or vertical alignment can be adjusted
The text’s line spacing can be adjusted
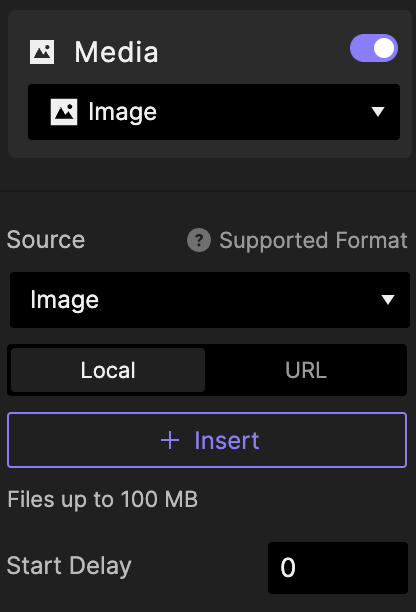
Modifying the content of an image, video, or Lottie layer. Depending on your plan, you can import images from your local files or, for Enterprise users, from a self-hosted URL.
The following formats are supported:
Learn more about the supported media files.
Choose an image, video, or Lottie from your device or import one from a self-hosted URL.
Enter the time delay to start the response.
.png?fm=webp)
Focusing in or out of an input layer.
The cursor focuses in on the selected Input Layer.
The cursor focuses out of the selected Input Layer.

Accessing or exiting the device's native camera.
The Camera response must be used together with the camera layer. It also enables you to utilize the QR & Barcode Scanner function for scanning QR codes and barcodes directly within your prototype.
Start the camera. You can choose between the front-facing camera and the rear-facing camera.
Stop the camera.
Use the current camera.
Use the current camera.
Use the rear-facing camera.
Use the camera facing the opposite side of the last used camera.
Enable scanning QR and barcodes from within your prototype.
Scan a QR code to open a link in a web browser. To scan barcodes, utilize the Keep Tracking option.
Monitor values stored in your QR or barcode.
Playing, pausing, and seeking video, audio, and Lottie layers.
Controlling the volume of video or audio files.
Adjusting the volume of an audio or video layer

Activating vibration and haptic feedback on smart devices.
Refer to Google's Android Developer Documentation and Apple's Human Interface Guidelines for more information about haptic feedback.

Activating reading a text out loud, either by inputting the text or through a formula.
Learn more about voice prototyping.
You can enter the text to be read out loud.
To make your voice interaction more dynamic, you can use formulas as long as the used formula results in a text. Also, you can use the predefined variable $voiceTranscript that stores the last voice command.
You can choose from 40 languages and language variants.
You can choose between a female and male voice per language.
You can adjust the speed by choosing a value between 0.5 and 2.
You can adjust the pitch by choosing a value between 0.5 and 2.

Activating listening to voice commands.
By default, prototypes do not pick up any voice commands. Hence, listening needs to be enabled first. Prototypes can listen to voice commands continuously for up to 5 minutes.
Learn more about voice prototyping.
When listening to voice commands is enabled, it would stop automatically as soon as no speech is being picked up anymore. In order to avoid this, you can check Continuous to make sure listening remains enabled even when no voice commands are picked up.
When Continuous has been checked, you would need a separate Listen response to stop listening. This means that when Continuous is unchecked, you do not need a separate Listen response to stop listening.

Resetting the current scene, a layer, or a variable. You can reset the whole scene and also default a layer or variable back to its initial state.
Halting the animation of a layer. For example, you can use Stop to stop a loading or progress bar.
Overwriting the value stored in a variable.
Configuring parameters that need to be met to trigger responses.
A Response is triggered when a property of the target layer exceeds that set for this property
A Response is triggered when a property of the target layer reaches or exceeds that set for this property
A Response is triggered when a property of the target layer goes below that set for this property
A Response is triggered when a property of the target layer reaches or goes below that set for this property
A Response is triggered when a property of the target layer is exactly the same as that set for this property.
A Response is triggered when a property of the target layer is not exactly the same as that set for this property