Create a Stopwatch Timer using Formulas and Variables
In this advanced tutorial, you'll prototype a stopwatch-styled timer while exploring how formulas, detect functions, and variables can manipulate data.

.jpg?fm=webp)
Time-based UI's are occasionally overlooked in UX design strategy, but stopwatch-styled timers are common features in exercise, cooking, and productivity apps. Consider the apps you use that include a temporal aspect of tasks and how you might incorporate a stopwatch timer into the app prototypes you are designing.
ProtoPie allows designers to create functioning stopwatch timers by using formulas, detect functions, and variables. With these powerful tools, ProtoPie is able to read and react to changes in data. While it may seem complicated, exploring these skills will prove that ProtoPie is a powerful tool for your data (and time) oriented designs!
What you will learn
- Automate the centiseconds using a variable
- Increase the second using detect and condition
- Increase the minute using detect and condition
- Stop and reset the stopwatch
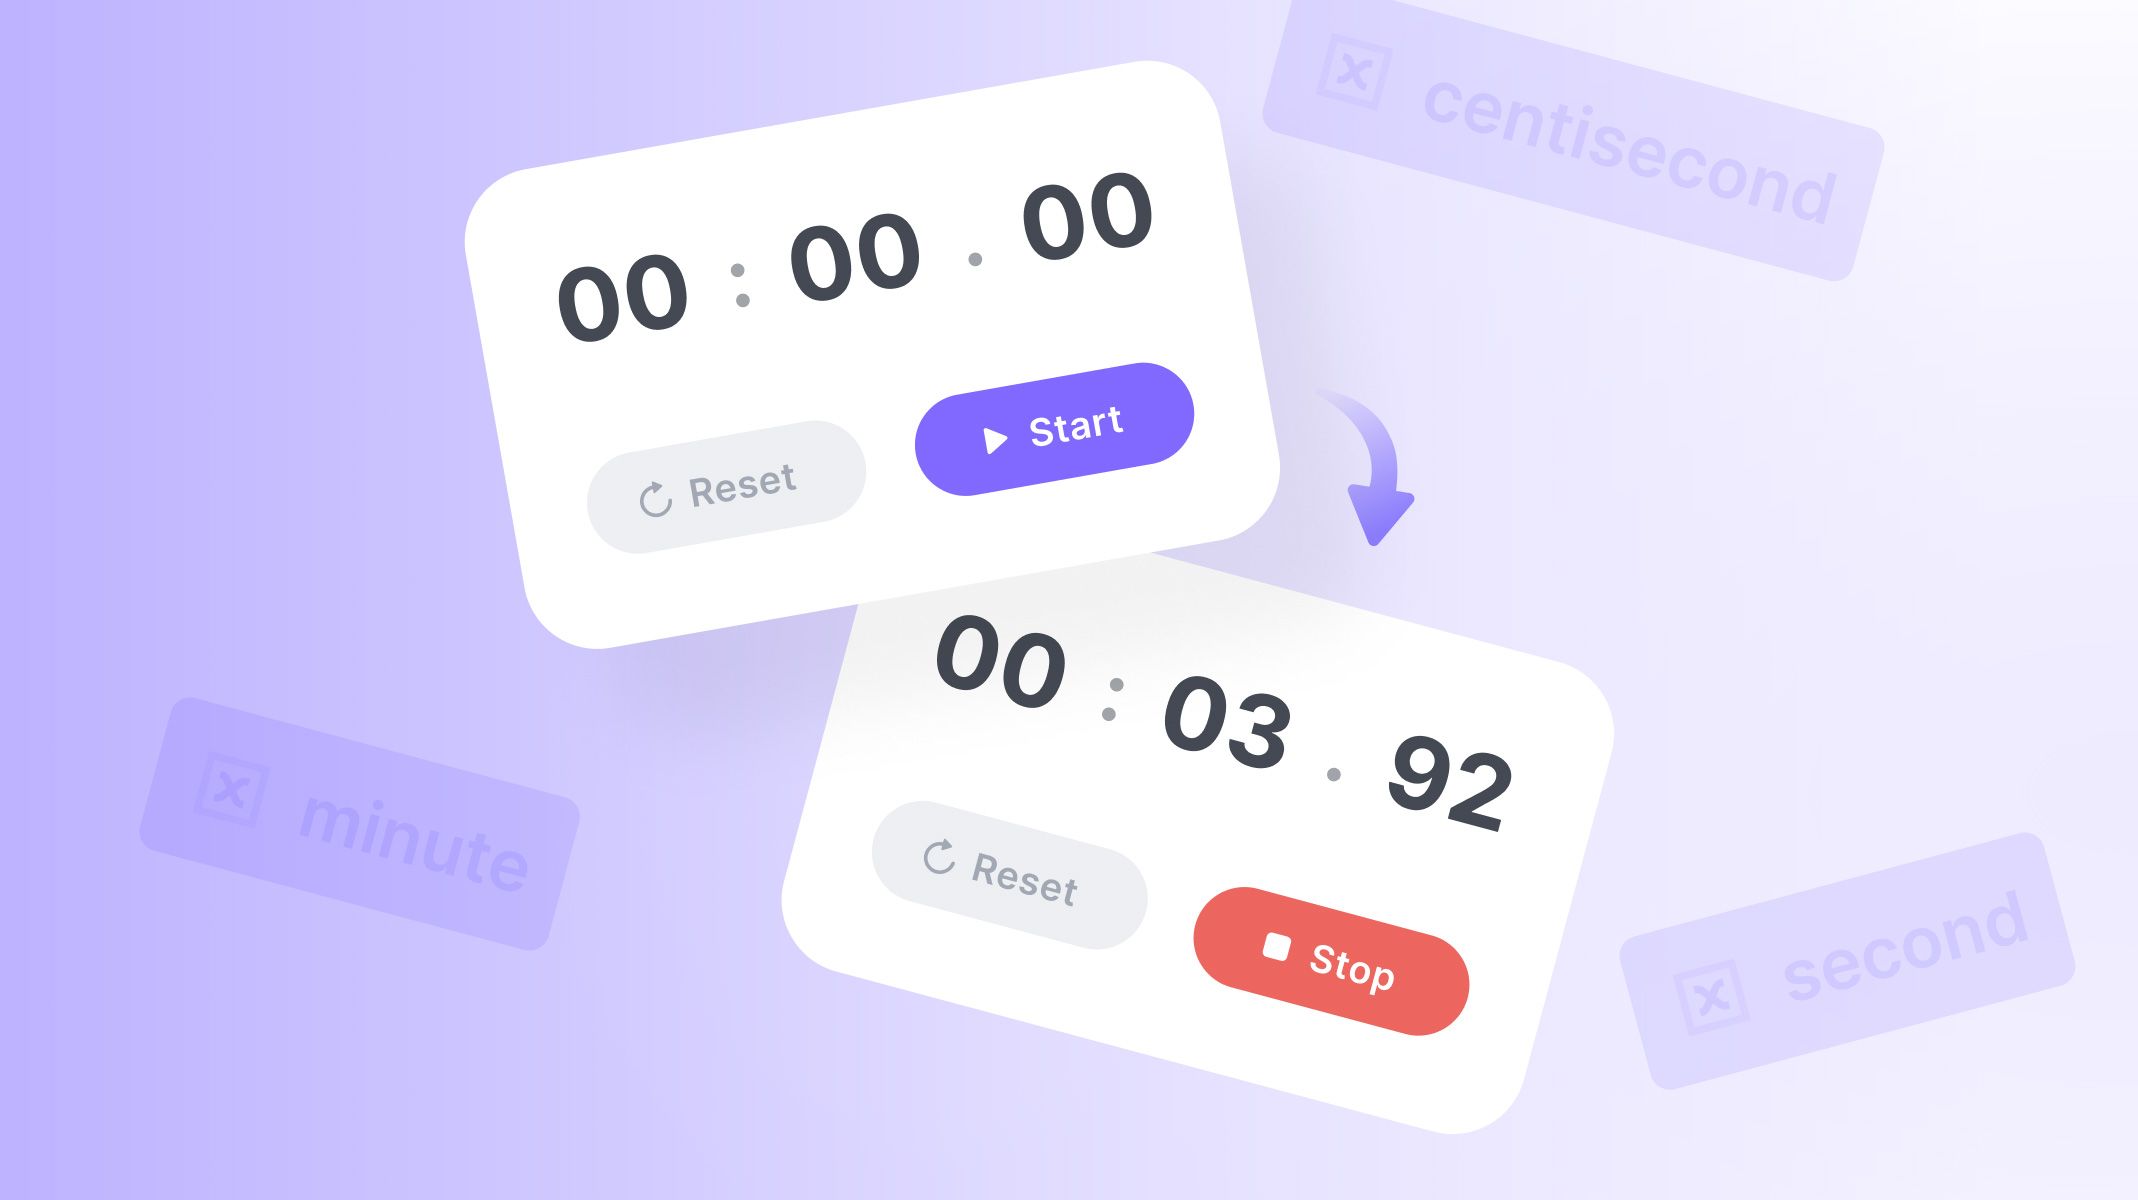
In the end, you’ll be able to make something like this!
.gif)
Before you start prototyping
In the assets, you'll notice that the interactions for the start/stop button have already been created. This is made with the Condition feature. If you want to learn how to make a button based on Condition, please check How to Make a Toggle Button with Condition.
Step-by-step instructions
1. Automate the centiseconds using a variable
1. You are going to start working on the last two digits (centiseconds) and making them start and stop with the button. Create a new variable and call it centisecond. Leave the variable's defaults so it will remain as a number and starting at zero. Drag out your debugger onto your preview screen so you can test your work.
.jpg?fm=webp)
2. Under the start condition, add an Assign that is linked to the centisecond variable. The formula will be centisecond+1. Toggle the repeat on and also the Infinite Repeat. The interval is 0.01
.jpg?fm=webp)
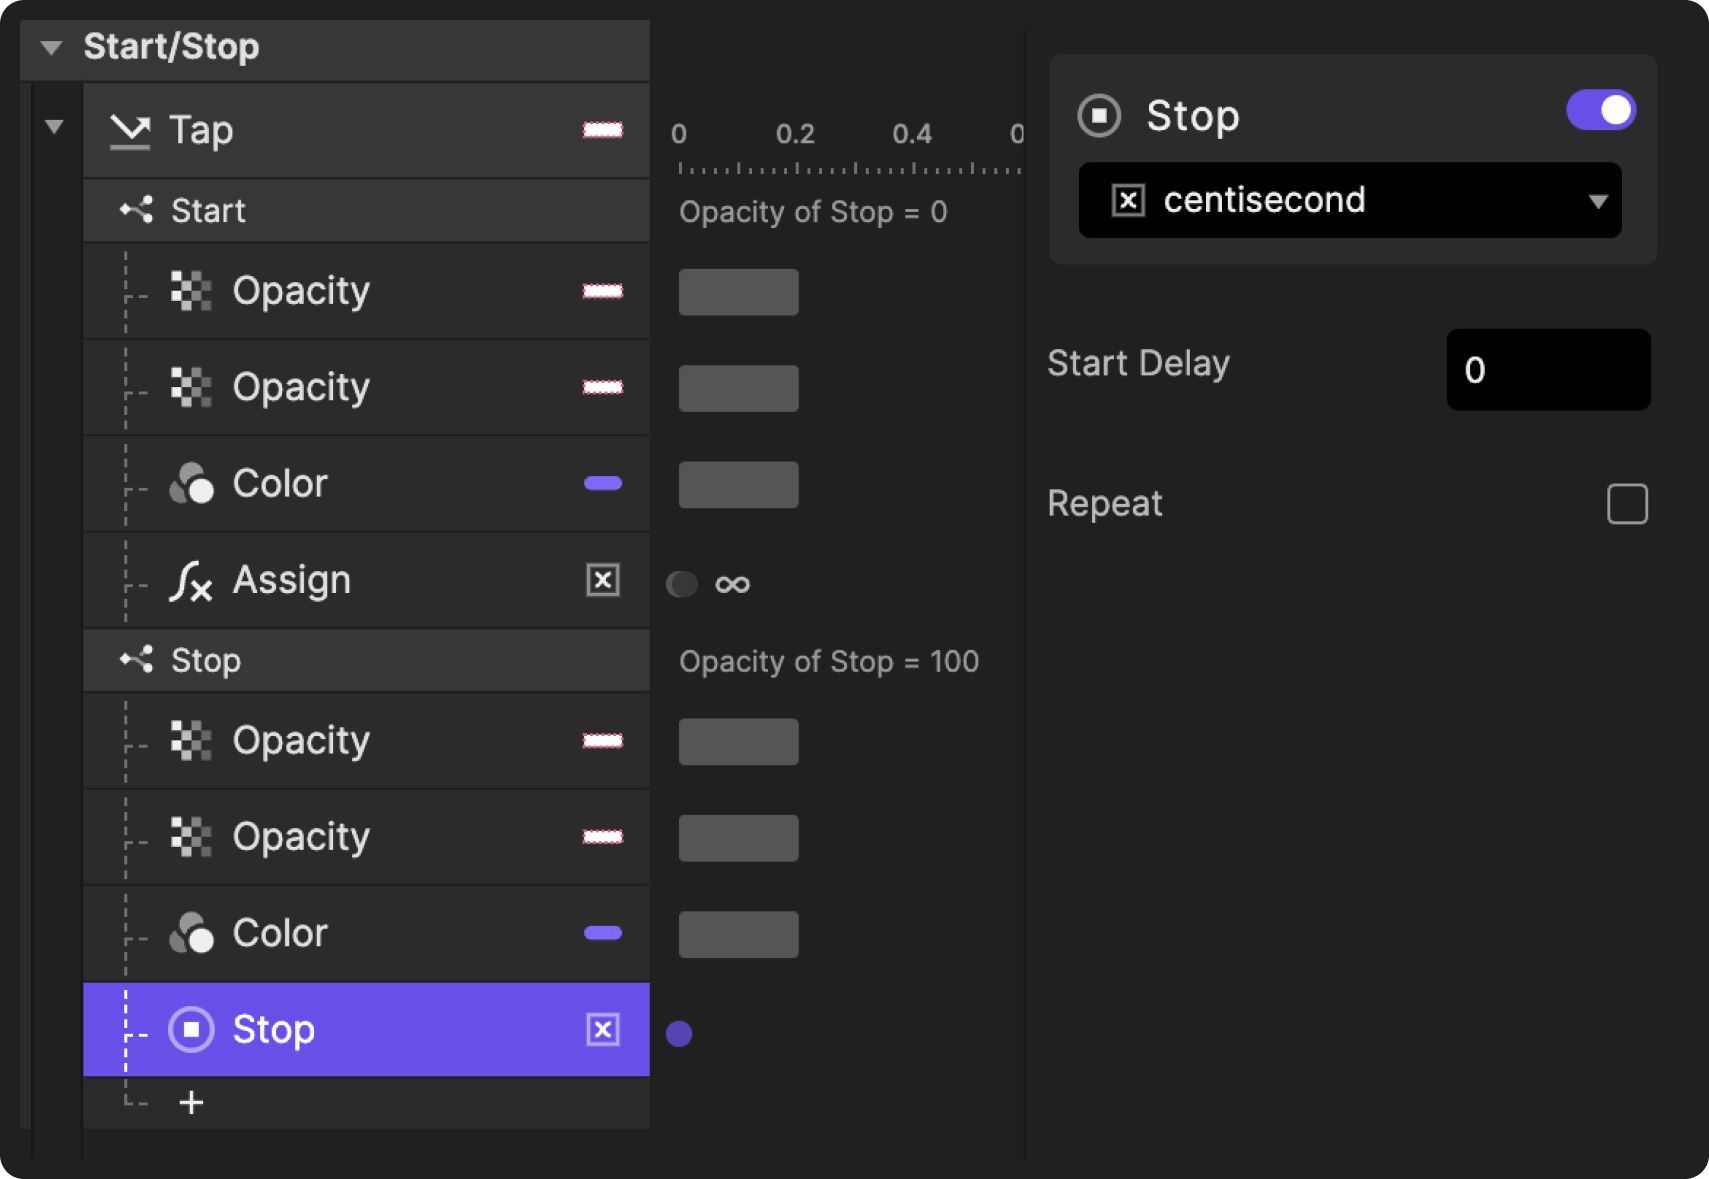
3. Under the Stop condition, add a Stop response to the centisecond variable. Testing your start and stop button in the preview, you'll notice the numbers do continuously go up and will stop with the button.
.jpg?fm=webp)
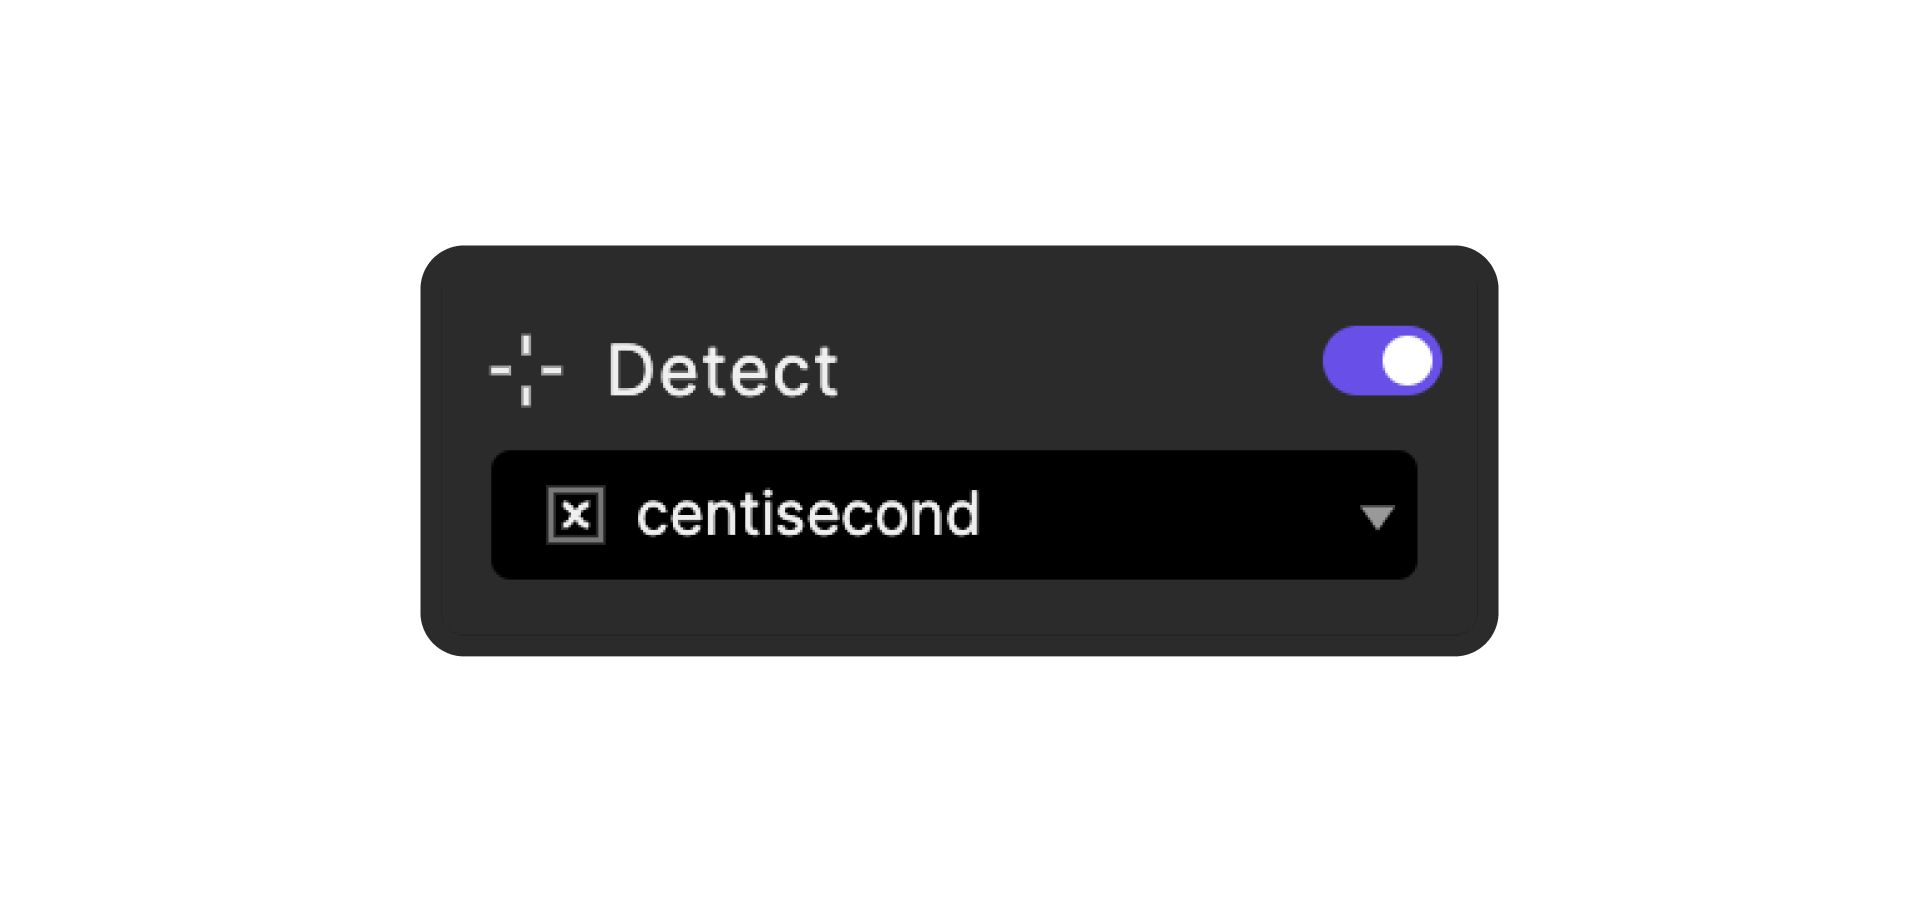
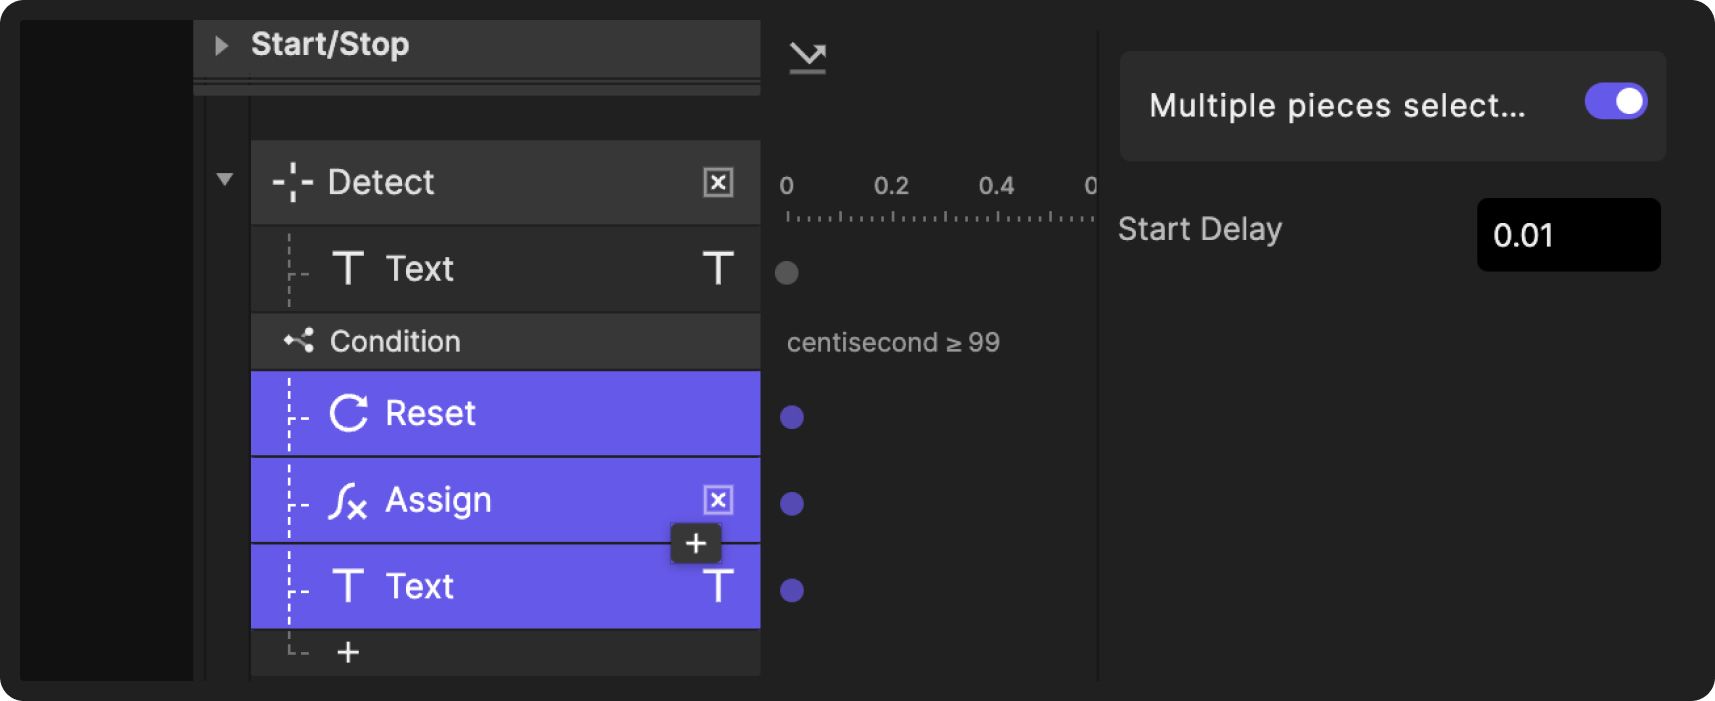
4. The centiseconds only have two digits so you'll need the numbers to reset at 99. To do this, add a new trigger and select Detect linked to the centisecond variable.
.jpg?fm=webp)
5. Create a condition, that reads when the centisecond ≥ 99. Then, add a Reset. Change the duration to 0 and the start delay to 0.01. It is very hard to notice this delay, but it is important for later on. Using your debugger, you can see that the value goes to 99 and then restarts at 0.
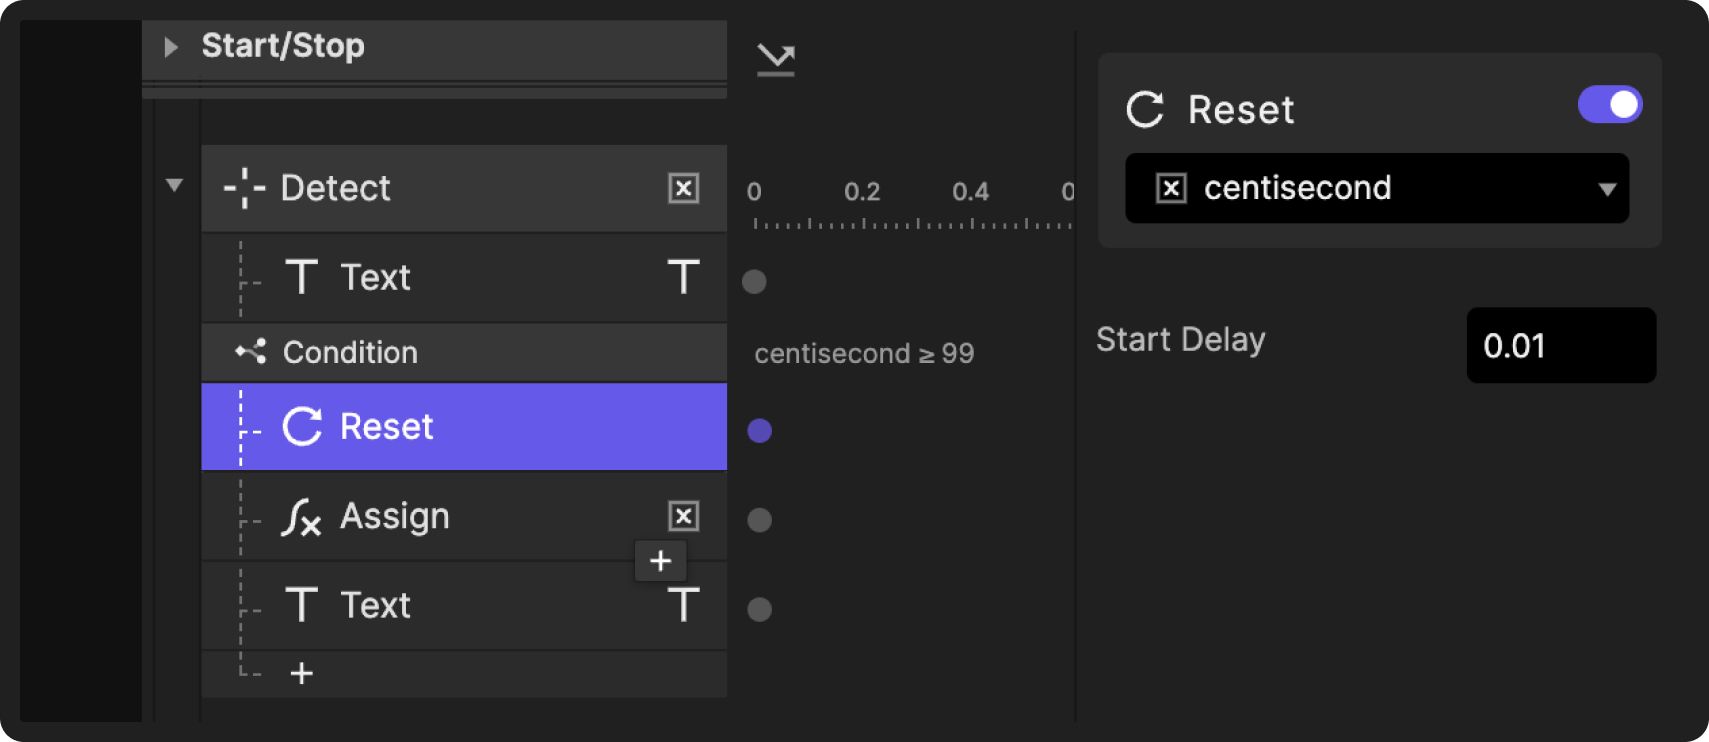.jpg?fm=webp)
6. Now, we want to assign this value to the text. Under the detect trigger, add a Text response. Link this to the centisecond and insert a formula, lpad(centisecond,2,"0"). This formula ensures that there are two digits in the centiseconds by inserting a 0 with single-digit numbers.
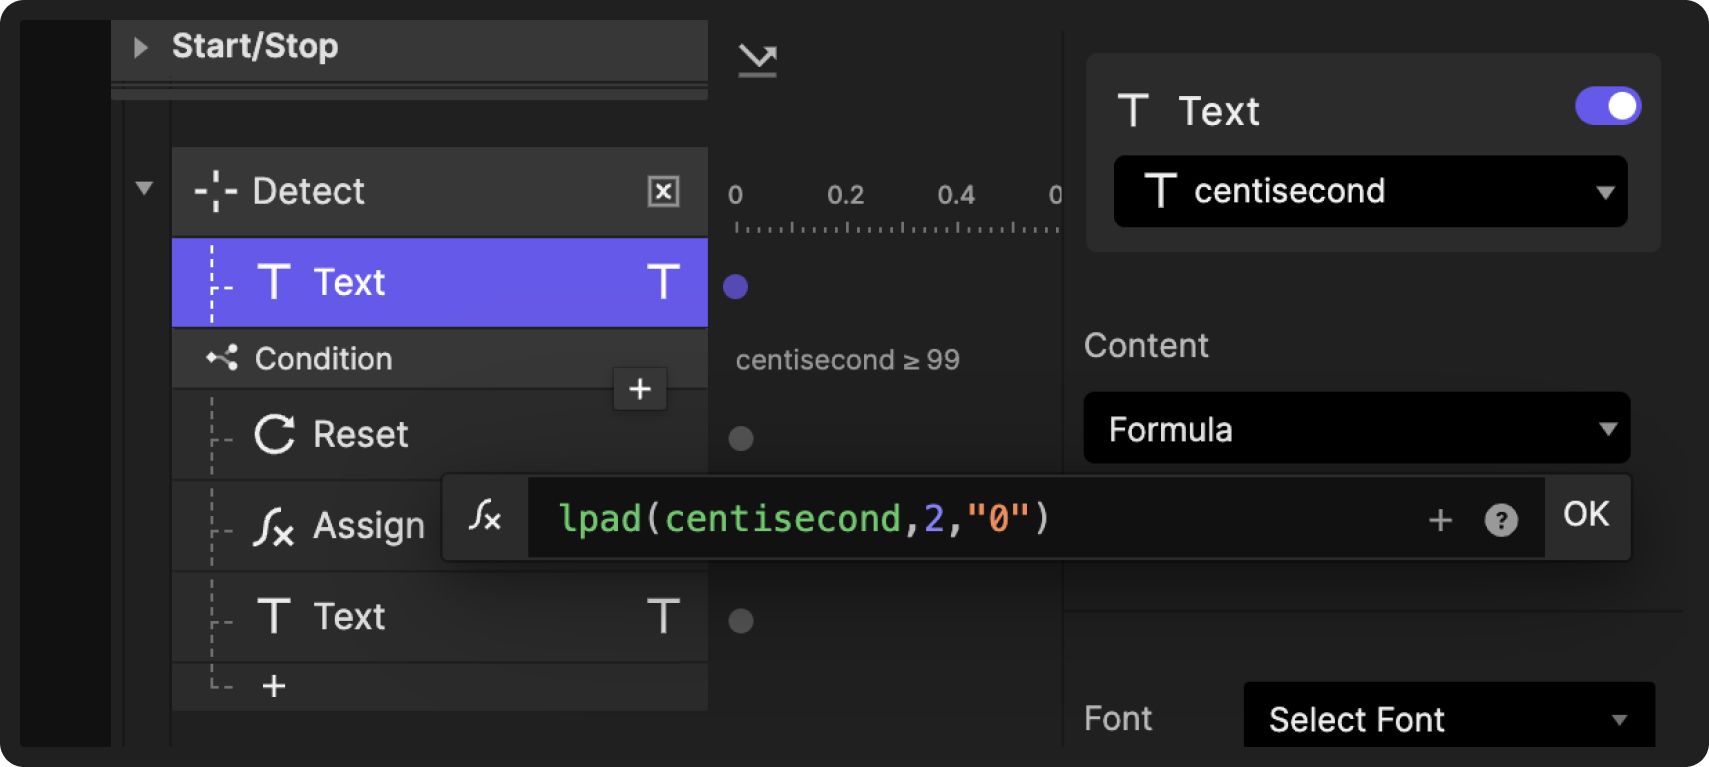.jpg?fm=webp)
💡 lpad(): Left-pad a text with another text, to a specific length.
lpad(source:TEXT,length:NUMBER,pad:TEXT)→ TEXT
2. Increase the seconds based on the centiseconds
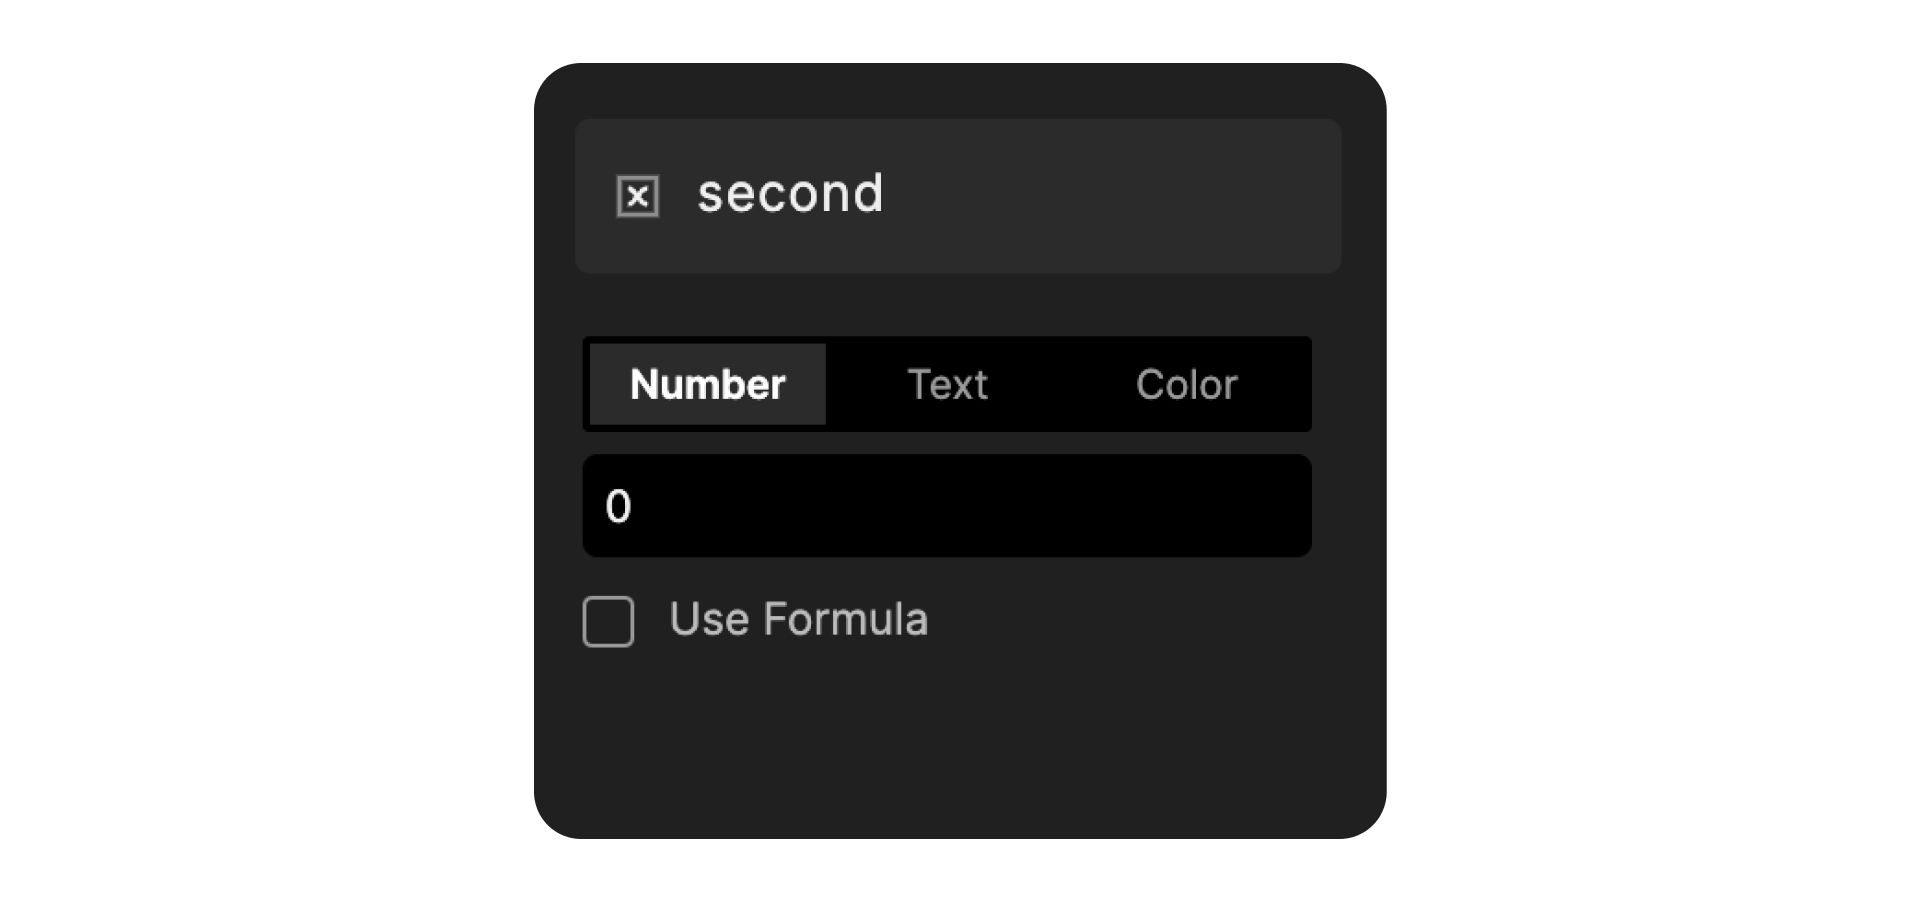
1. When the centiseconds reach 99, we want the seconds to increase by 1. To do this, add a variable and rename it second. Leave the variable's defaults so it will remain as a number and starting at zero. Drag the debugger onto your preview scene.
.jpg?fm=webp)
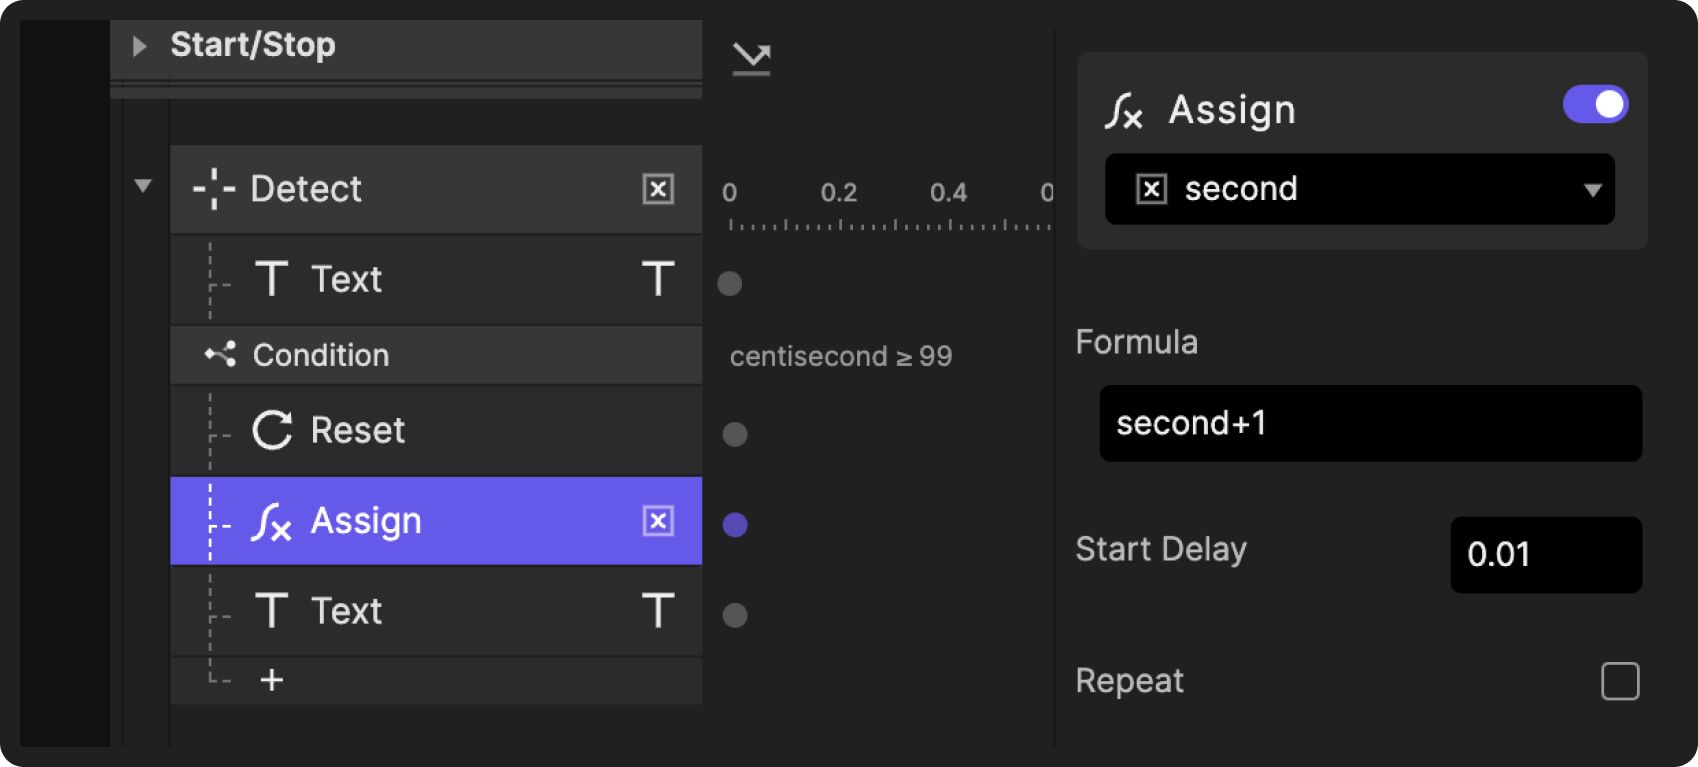
2. Under the Detect trigger, add an Assign under the Condition we just created and link it to the second variable. Type into the formula, second+1 so every time the centiseconds reach 99, the seconds will increase by 1. Change the start delay to 0.01. Do not make this repeat.
.jpg?fm=webp)
3. Assign the variable to the text by adding a Text response linked to the "second" text. As before, the formula will be lpad(second,2,"0") and will add a 0 to all single-digit numbers.

4. Make sure to change the start delay to 0.01 and that the Text response for the second variable is after the Assign response. The order of the interaction pieces is also important. Make sure that the Assign response is above the Text response. You do this because you want ProtoPie to trigger the Assign response then the Text response.
.jpg?fm=webp)
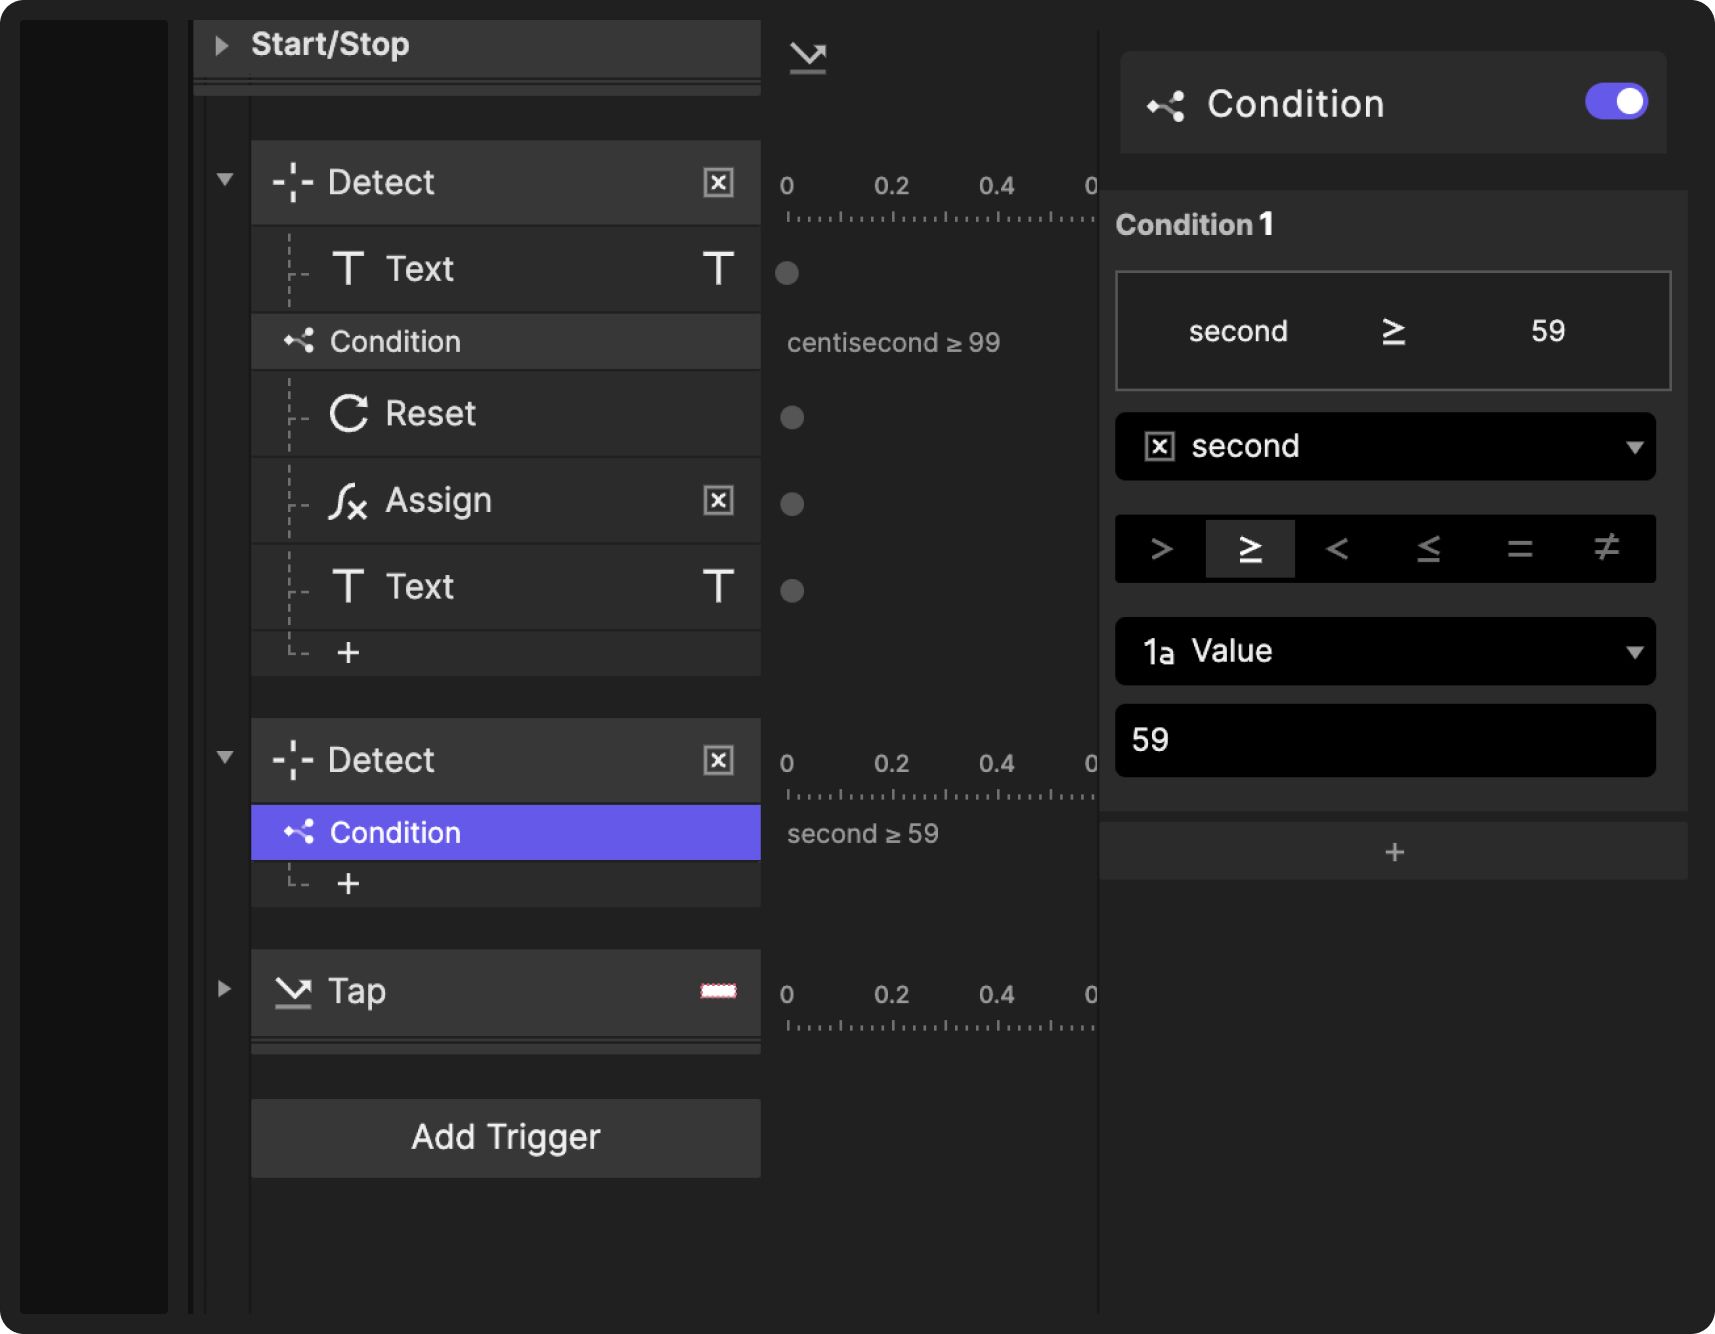
3. Increase the minutes based on the seconds
1. Add a Detect trigger linked to the second variable. Then, add a condition linked to the second variable that reads, when the second variable ≥ 59.
.jpg?fm=webp)
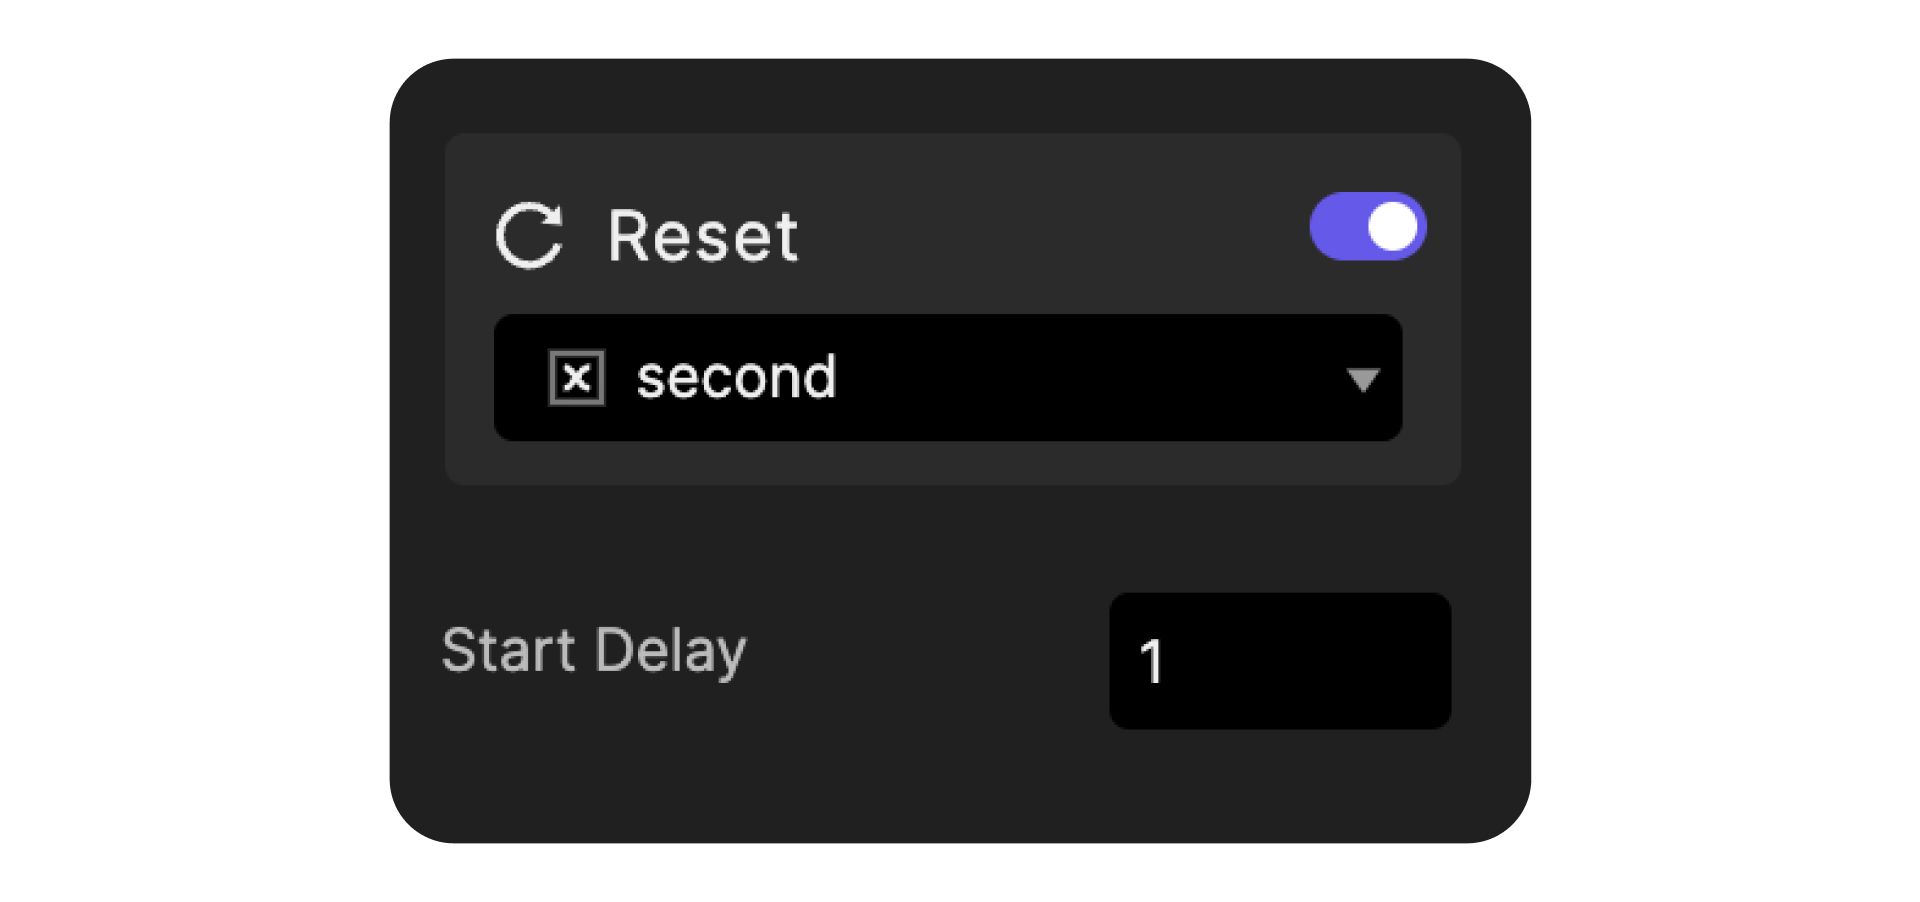
2. Under this condition, create a Reset response linked to the second and make the start delay 1.
This means that when the seconds reach 59, it will delay by 1 second before restarting to 0.
.jpg?fm=webp)
3. Along with resetting the variable, you need to reset the text. Add another Reset linked to the second text and change the start delay to 1.
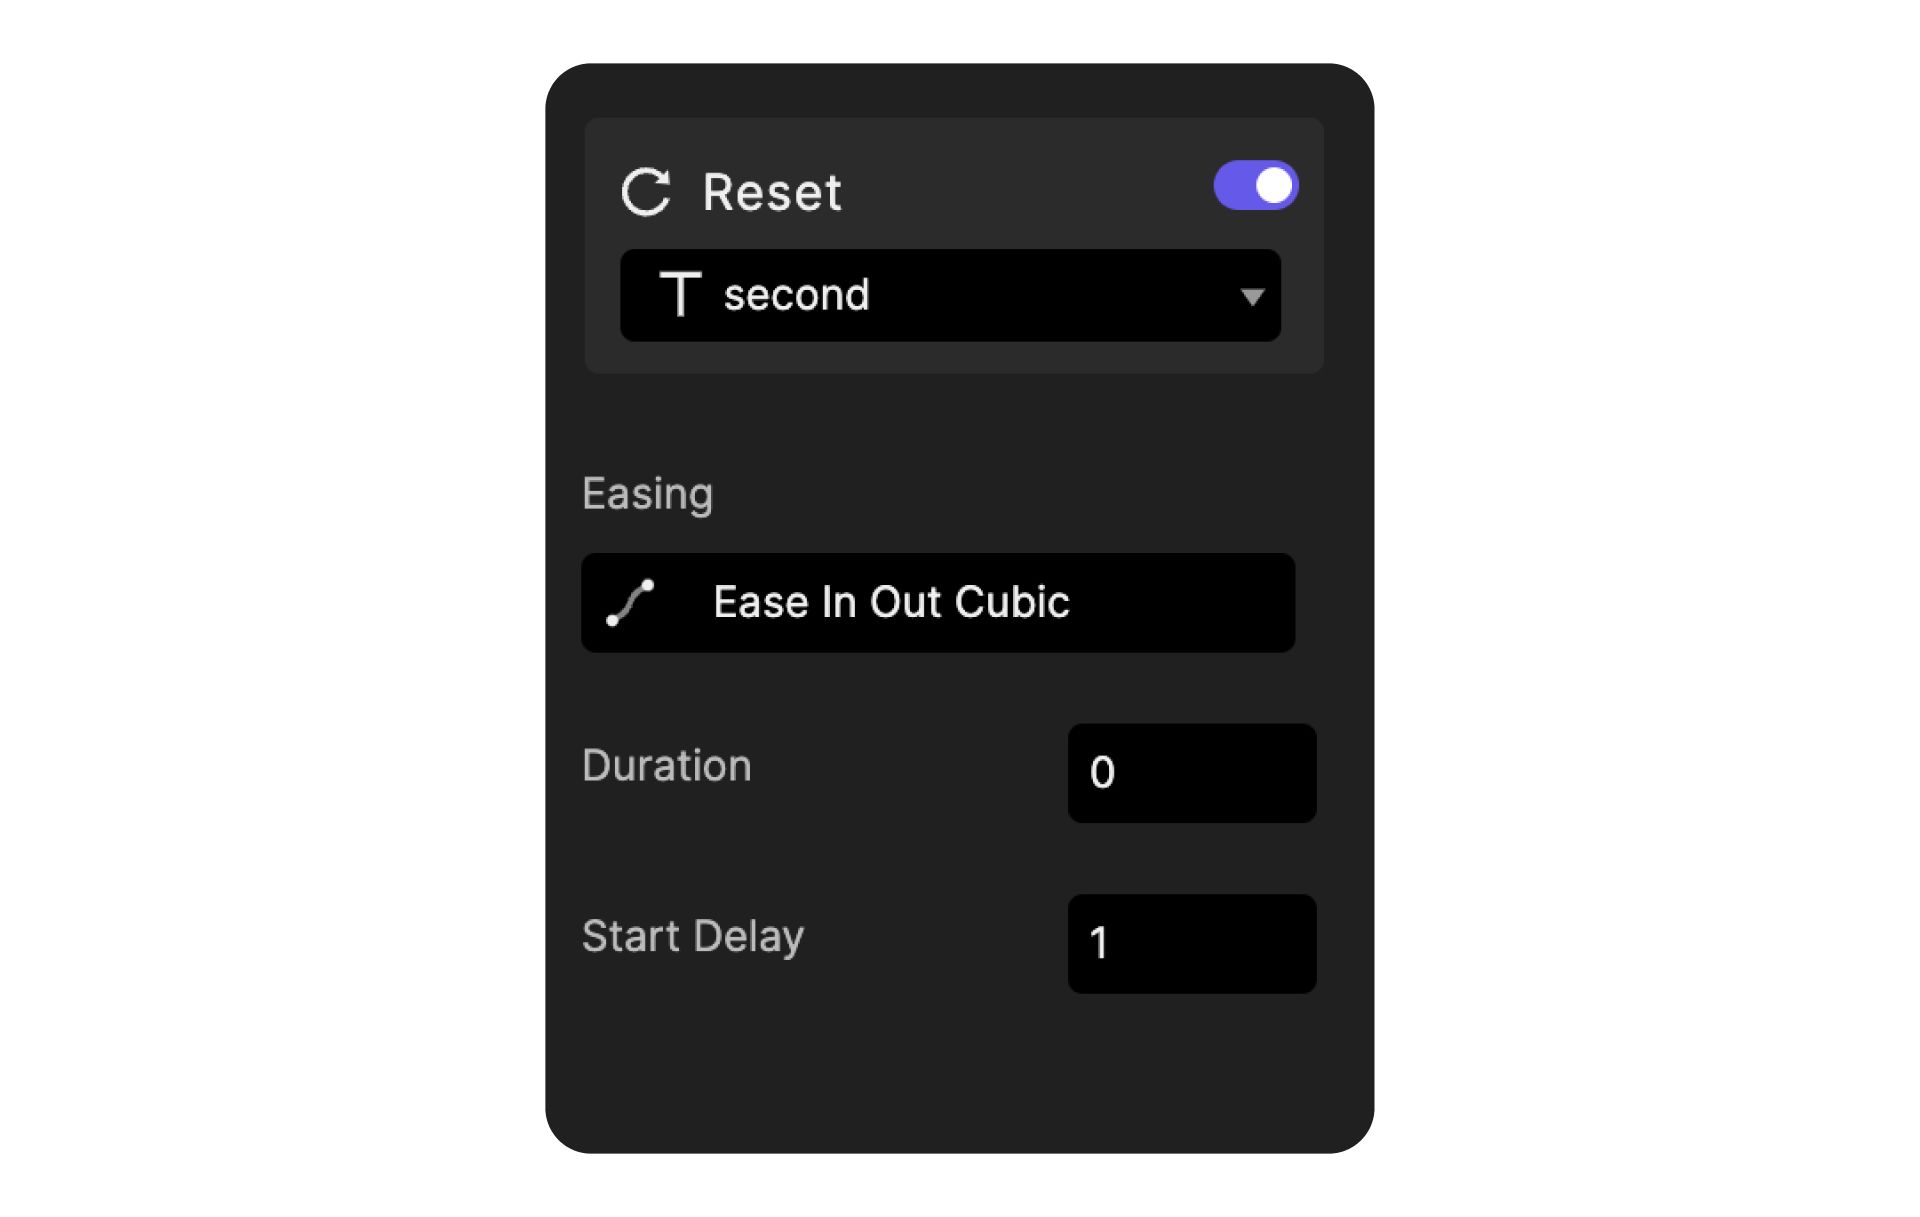.jpg?fm=webp)
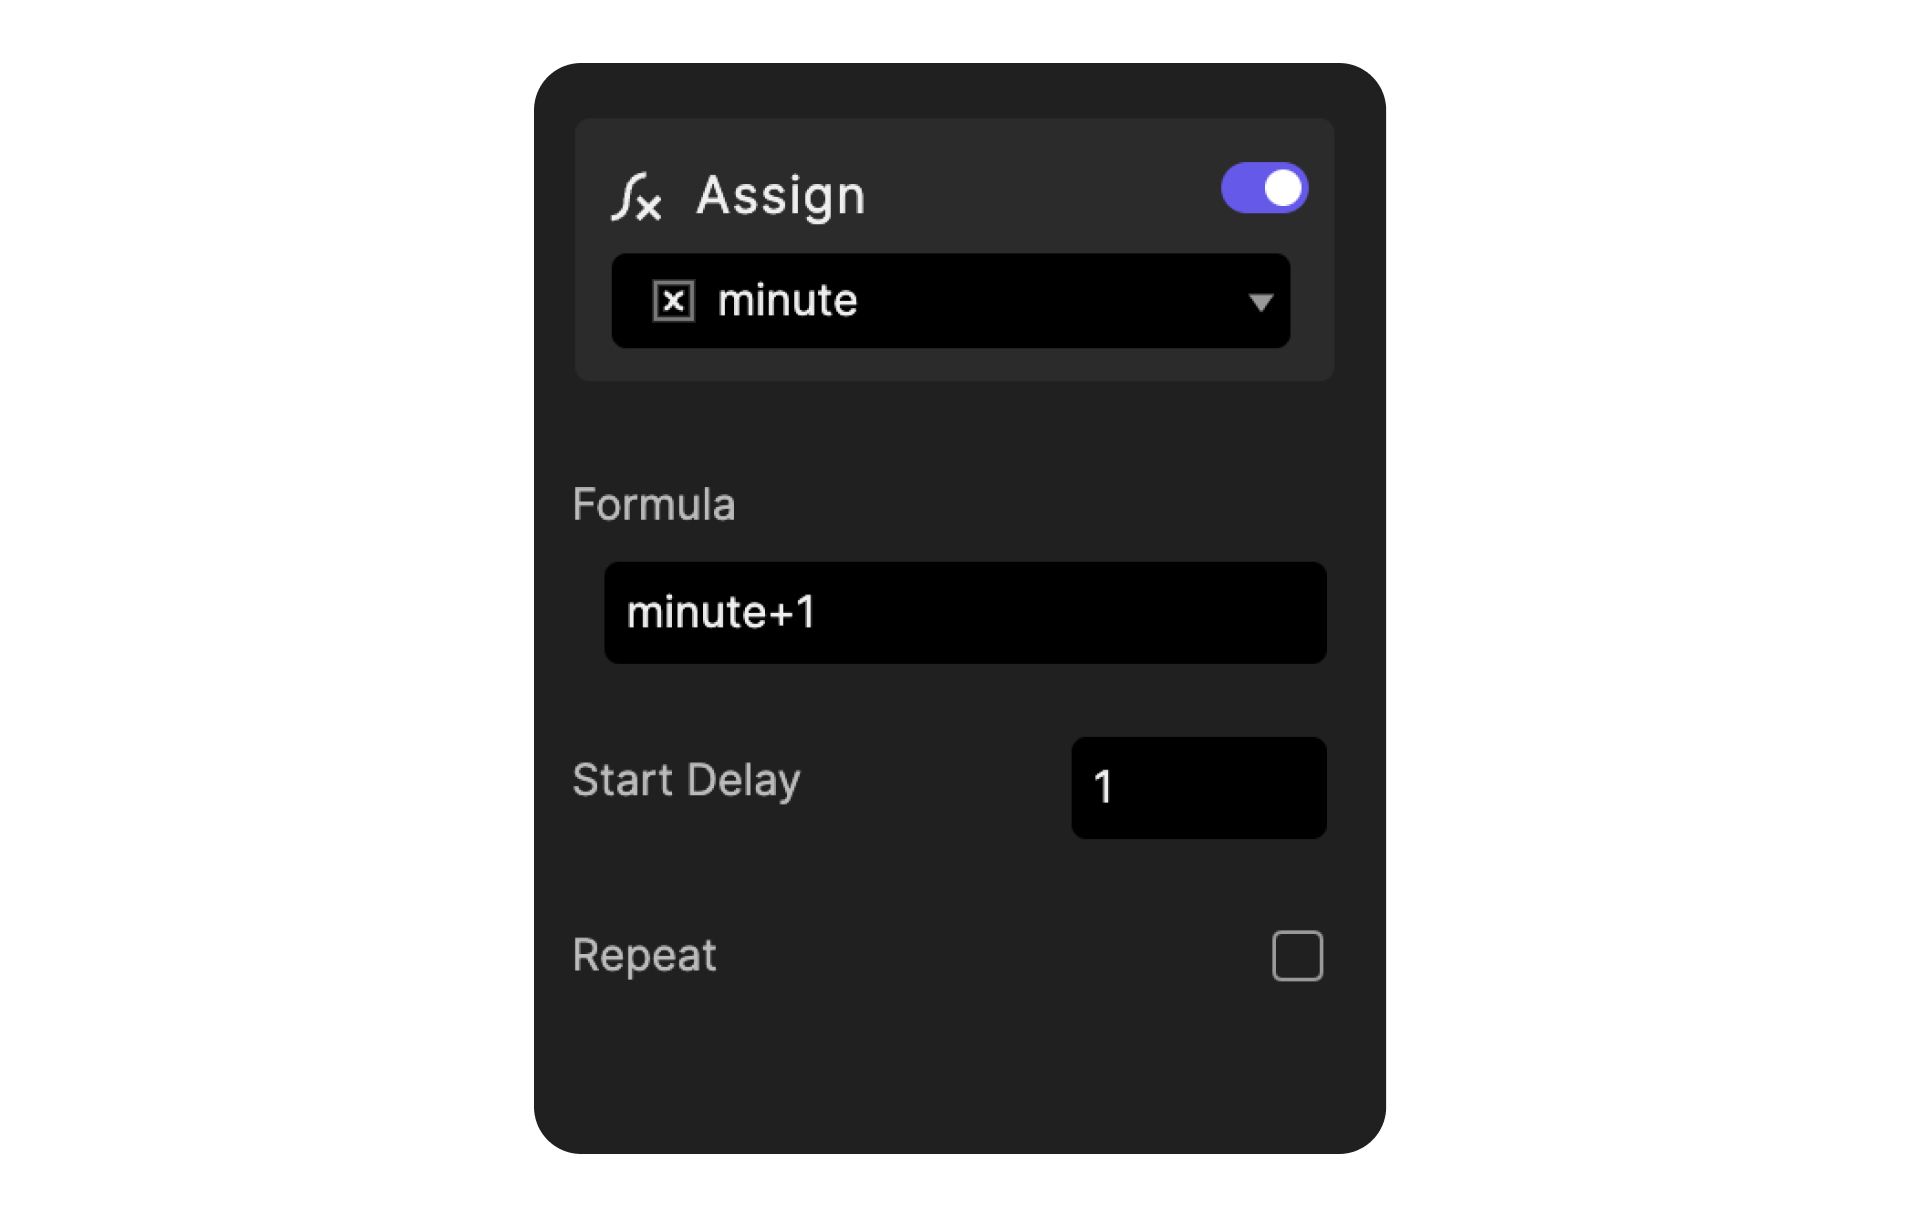
4. To link the minute variable to text, create a variable and rename it "minute". Add an Assign response under the last Reset response and link it to the minute variable you just created. The formula will be minute+1. The start delay will be 1.
.jpg?fm=webp)
5. Create a Text response under the assign, link it to the minute text, and use the formula, lpad(minute,2,"0"). Change the start delay to 1.
.jpg?fm=webp)
6. In the preview window, when the seconds reach 59 the minutes should increase by 1 and the seconds reset to 0.
4. Make the reset button actionable
1. Create a Tap trigger for the reset button. Create a Stop response linked to the centisecond variable.
2. Then, you need to reset all the variables (centisecond, second, minute) followed by their corresponding text. Create three reset responses each linked to these three variables. Create three reset responses each linked to the text of these three variables.
3. You also need to reset the start/stop button's to their original state. Select the Stop layer and create a reset response. Then, create a reset response with the Start and Base layers.
4. See the image below for reference.
.jpg?fm=webp)
Congratulations! Your stopwatch timer is ready
You explored many advanced techniques in this tutorial including using Formulas, Detect, and Variables! Now that you've learned these techniques, consider how you can incorporate other strategies to make stopwatch timers for your unique designs!
Ready to bring your ideas to life? Download ProtoPie now to start building your next prototype, and don’t forget to share your amazing work on LinkedIn, X, or Instagram with #MadeWithProtoPie. We can't wait to see what you create!
.jpg?fm=webp)

.jpg?fm=webp)