Create a Long Press Menu Animation Using Range Trigger
Learn how to utilize range triggers to hide and show elements with a long press.


Introduction
Sometimes, we need to hide some menus inside a single button in mobile applications because of the limited space.
In this article, we'll learn how to create a nice interaction that would help us hide and show floating menu buttons when we long-press a button, using the Range trigger.
What you will learn
- Create a long-press interaction
- Scale the floating buttons on-touch
In the end, you'll be able to make something like this!
.gif)
Step by step instructions
1. Creating the long-press interaction
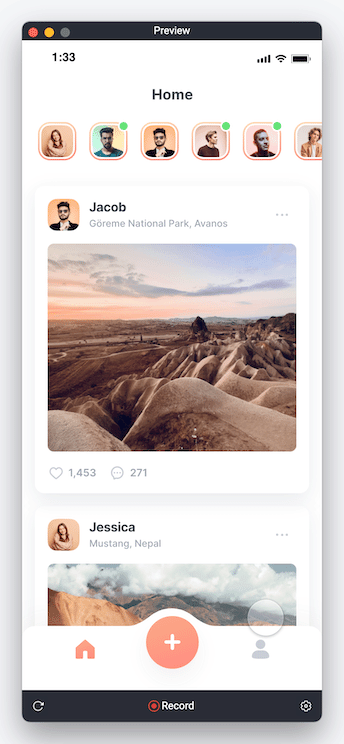
1. Select the "plus" button layer, and add a Long Press trigger.

2. Select the Live menu button, and in the Long Press trigger, add a Move response. We will use its current X and Y position as the value for the Move response.
Set the X value to 114 and the Y value to 685.

💡 We use the Live button's current position because it is already in the correct "show" position.
3. Do the same with the other 2 floating menu buttons. Select the menu buttons, add a move response under the Long Press trigger, and use their respective X and Y positions as the move response value.

💡 You can play around with the timeline of the Move response to get interesting interactions. Try to change the easing, start delay, and duration to see how they affect the micro-interaction.
4. We have the "show" position of the 3 floating menu buttons when the Plus button is on long-press. But in the beginning, we want them to be hidden.
Let's hide those 3 buttons under the Plus button. You can drag them manually to sit behind the Plus button or set the X to 188 and the Y value to 753.

Once you've done this, you will be able to long-press on the prototype and show the hidden floating menu buttons. However, this is still half of the interaction because when you lift your finger, you need to hide them.
5. To hide the floating menu buttons, let's select the Plus button layer and add a Touch Up trigger. This trigger helps to detect when the finger released the touch from the prototype.

6. Then, let's reset the position of the floating menu buttons. To do this, select each of the buttons and add a Reset response.

The Reset response is a useful response that can reset all the changes made to an element, so you don't have to do it manually. Keep this in mind!
7. And... we are done! You can now hide and show components using the long-press trigger. Now, let's go to the next step and make the interaction more interesting!
.gif)
2. Scale the buttons on-touch
We will add a scale interaction for the floating menu buttons when we slide our fingers on top of the buttons:
.gif)
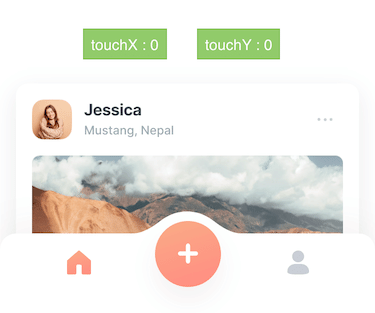
1. First, let's create two variables to store the position of our fingers. Let's call it touchX and touchY. Choose the second option for both variables, add the variable For This Scene.

2. In ProtoPie 5.5, you can use formulas inside of a variable. We will capture the touch position and then store it in the variable that we just made.
Select the touchX variable, and on the right panel, check the Use Formula box. Type in $touchX inside the formula field. Do the same with touchY, but instead, write $touchY in the formula field.

3. Press the "debug" icon next to the variable so you can see the value of touchX and touchY.

4. Try this in your prototype. While long-pressing the plus button, drag your finger around and notice the X and Y value change as you drag.
.gif)
Next, we will scale up the size of the floating menu buttons when we drag our fingers on top of it. We will need to know the X and Y "range" of the button to do that.
The X and Y range is the area of the screen that the button covers. We can calculate it based on the button's position, minus the height/width of the button. Look at the following example for the Live button:

In the image above, the Live button size is 60px by 60px, and the position is on (114,685).

However, (114,685) is actually just pointing to a single pixel at the center of the button. When we drag our fingers on top of the button, we need to cover the whole area of the button, not just the center of it.
That is why we are using the range trigger. We have to count the area of the whole button, so we need to expand the "center" area.

Since we start at the center, we only need to deduct the X by 30 to get the starting value and add the X by 30 to get the end value. The same goes for the Y value.
5. Now that we covered the concept, let's add the trigger to the prototype. Select the touchX variable under the range trigger because we want to detect the value of touchX.
Select the "range between" icon (the third icon) and input 84 in the starting value and 144 in the end value. With this, we have covered the correct X area of the Live button.

6. Now, we need to make sure that we also cover the proper Y range of the button. Under the range trigger just now, let's add two conditions with the touchY variable as the property:
- The first condition is to check if the value of touchY is bigger than 655. 655 is the starting range of the Live button.
- The second condition is to check if the value of touchY is smaller than the end range, which is 715.

7. Under the condition, let's add a Scale response. When our fingers are on top of the Live button, we want to scale it up. Select the live button layer, and add the scale response. Set the value to factor to 120%. However, feel free to adjust the size as you like.

💡 Here, we are using the AND logic: IF the range of X matches AND the range of Y matches THEN, scale the button to 120%.
- This means we will only scale the button to 120% when both of the condition is met.
8. If you try the prototype, you can see the scale interaction when you long-press and drag your fingers to the Live button. However, when you move your fingers away, it will not scale down.
To scale it down, we need to add another range trigger. But now, we are going to do the opposite of what we did before. Add a Range trigger, and select the touchX variable as the property.
Select the "smaller and larger than" range, which is the 4th icon on the right. Set the start value to 84 and the end value to 144.

9. Select the Live button layer, and add a Scale response under the Range trigger. Set the value to factor to 100%. This means we will scale it back to 100% size when our fingers left the button touch area.

10. Do the same thing with touchY. Add a range trigger, select the touchY variable as the property, and choose the "smaller and larger than" range. Set the start range to 655 and the end range to 715. Copy the scale response that we just made for touchX, and paste it under the range trigger of touchY.
💡 We are using the OR logic when trying to detect if the finger is outside of the button. This means IF the range of X does not match, OR the range of Y does not match, THEN, scale the button to 100%.
- The scale response will happen when either of the condition is met.
11. We have to apply the same logic for the other 2 floating menu buttons. Try to do it yourself! Use these X and Y range values as your guide:
- Post menu button
- X range start: 158
- X range end: 218
- Y range start: 619
- Y range end: 679
- Story menu button
- X range start: 230
- X range end: 290
- Y range start: 655
- Y range end: 715
12. Once you are done with the last part.. voila! You just made your own long-press menu interaction!
That's it!
You just created your own floating menu button interaction using the long-press and range trigger. Play around with the prototype and look at how nice it looks!
We would love to see your crazy experiments. Create your own prototype and share it on Twitter or Instagram with #MadeWithProtoPie


.jpg?fm=webp)