Calculating Total Payable Amount in the Shopping Cart Using Component
In this lesson, you will learn how to use the stepper component for calculating the total payable amount in an e-commerce app.


Introduction
Counters (also known as steppers in iOS design) are one of the most commonly used UI elements. Steppers are usually used in e-commerce websites to update the shopping cart quantity. When the user adds an item to the cart, he can always increase/decrease the cart items by using the counter. The number of items reflects the total payable amount for the user. This lesson will cover how counters are used to update the final payable cart amount.
ProtoPie makes use of the stepper component along with the send/receive functionality, variables, and formulae to achieve this.
What you will learn
- Convert interactions into component
- Send the component value to the scene
- Receive the value from the component in the scene and assign it to a variable
- Calculate the total payable amount using a formula
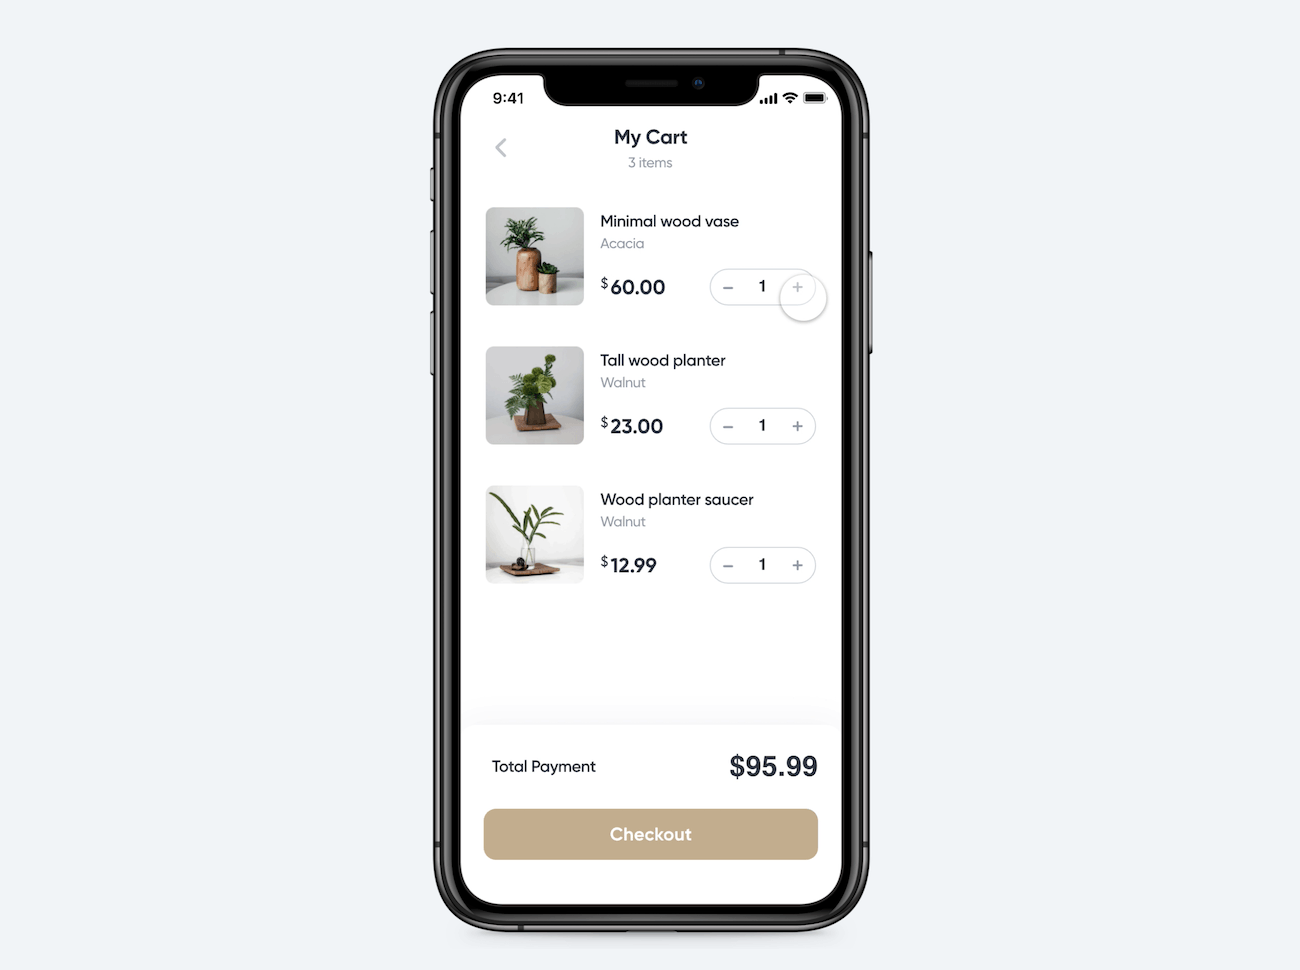
In the end, you’ll be able to make something like this!
Before start
You can learn more about making an Input Stepper from the link above.
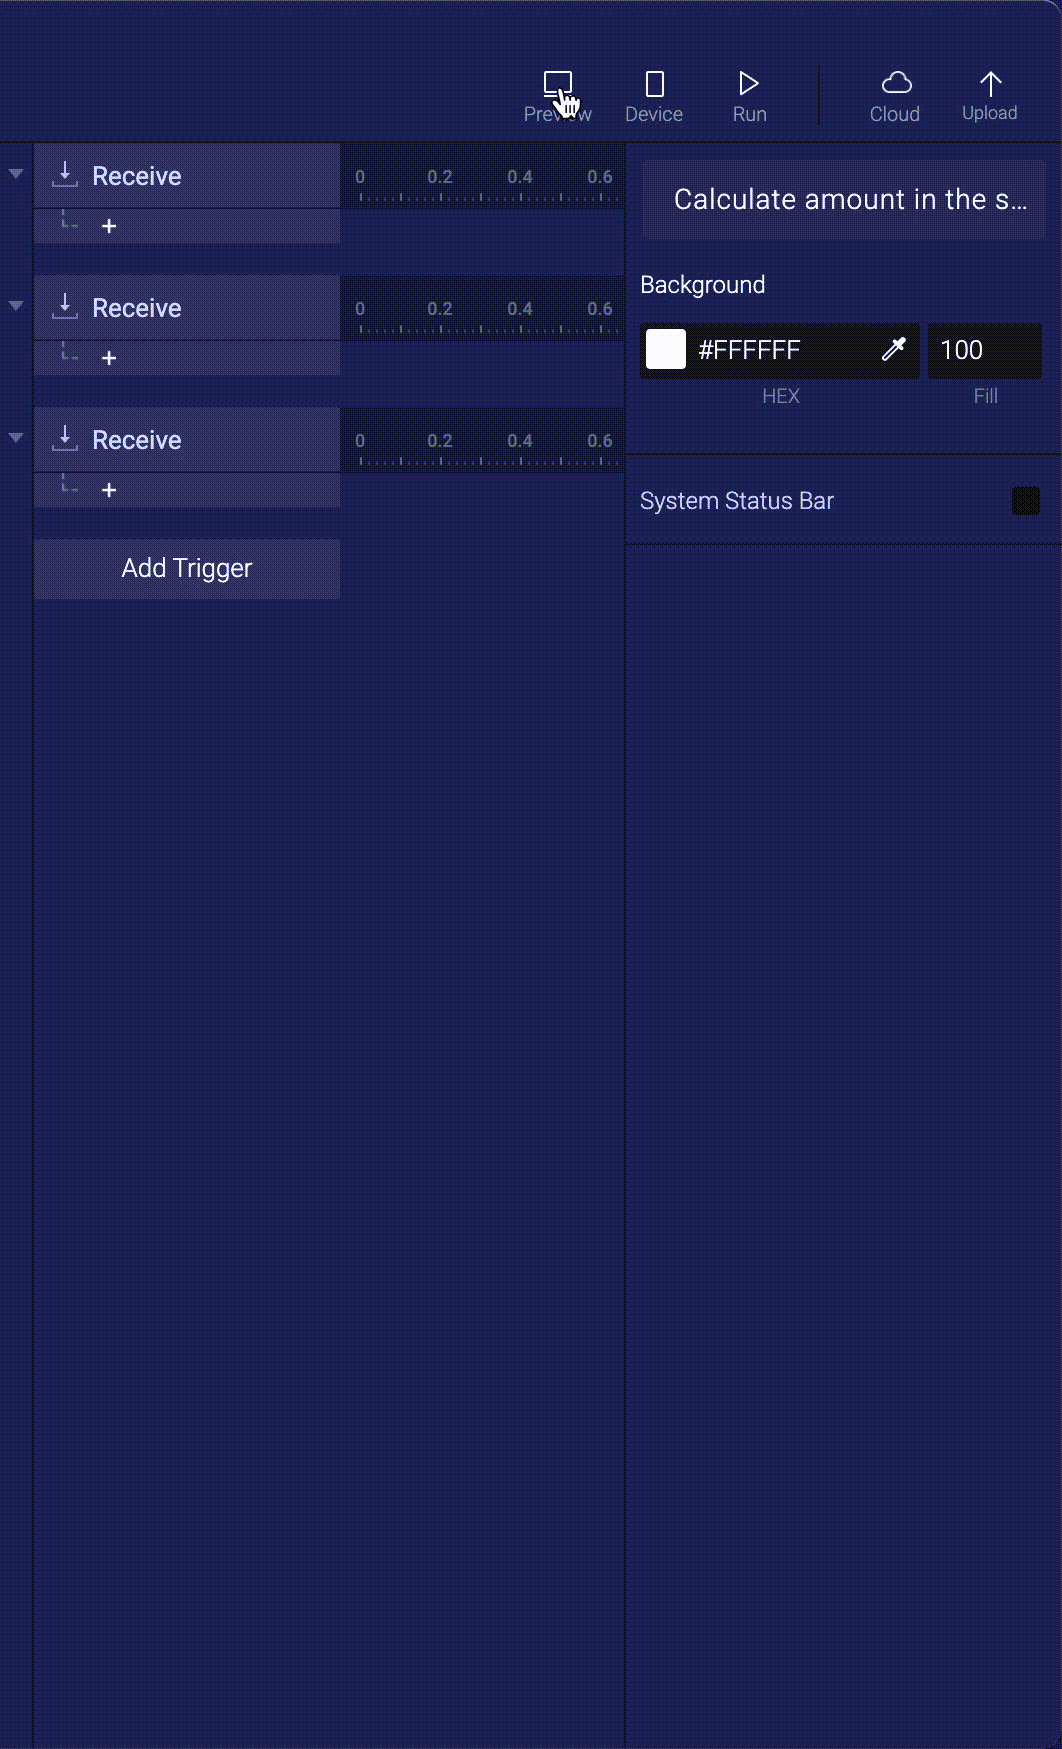
Before starting the tutorial, make sure that the counter number and the total payable amount are converted into an editable text layer (if imported from Figma/Sketch). We'll make use of variables and arithmetic formulas to calculate the total payable amount which will be explained further in step-by-step instructions.
Step-by-step instructions
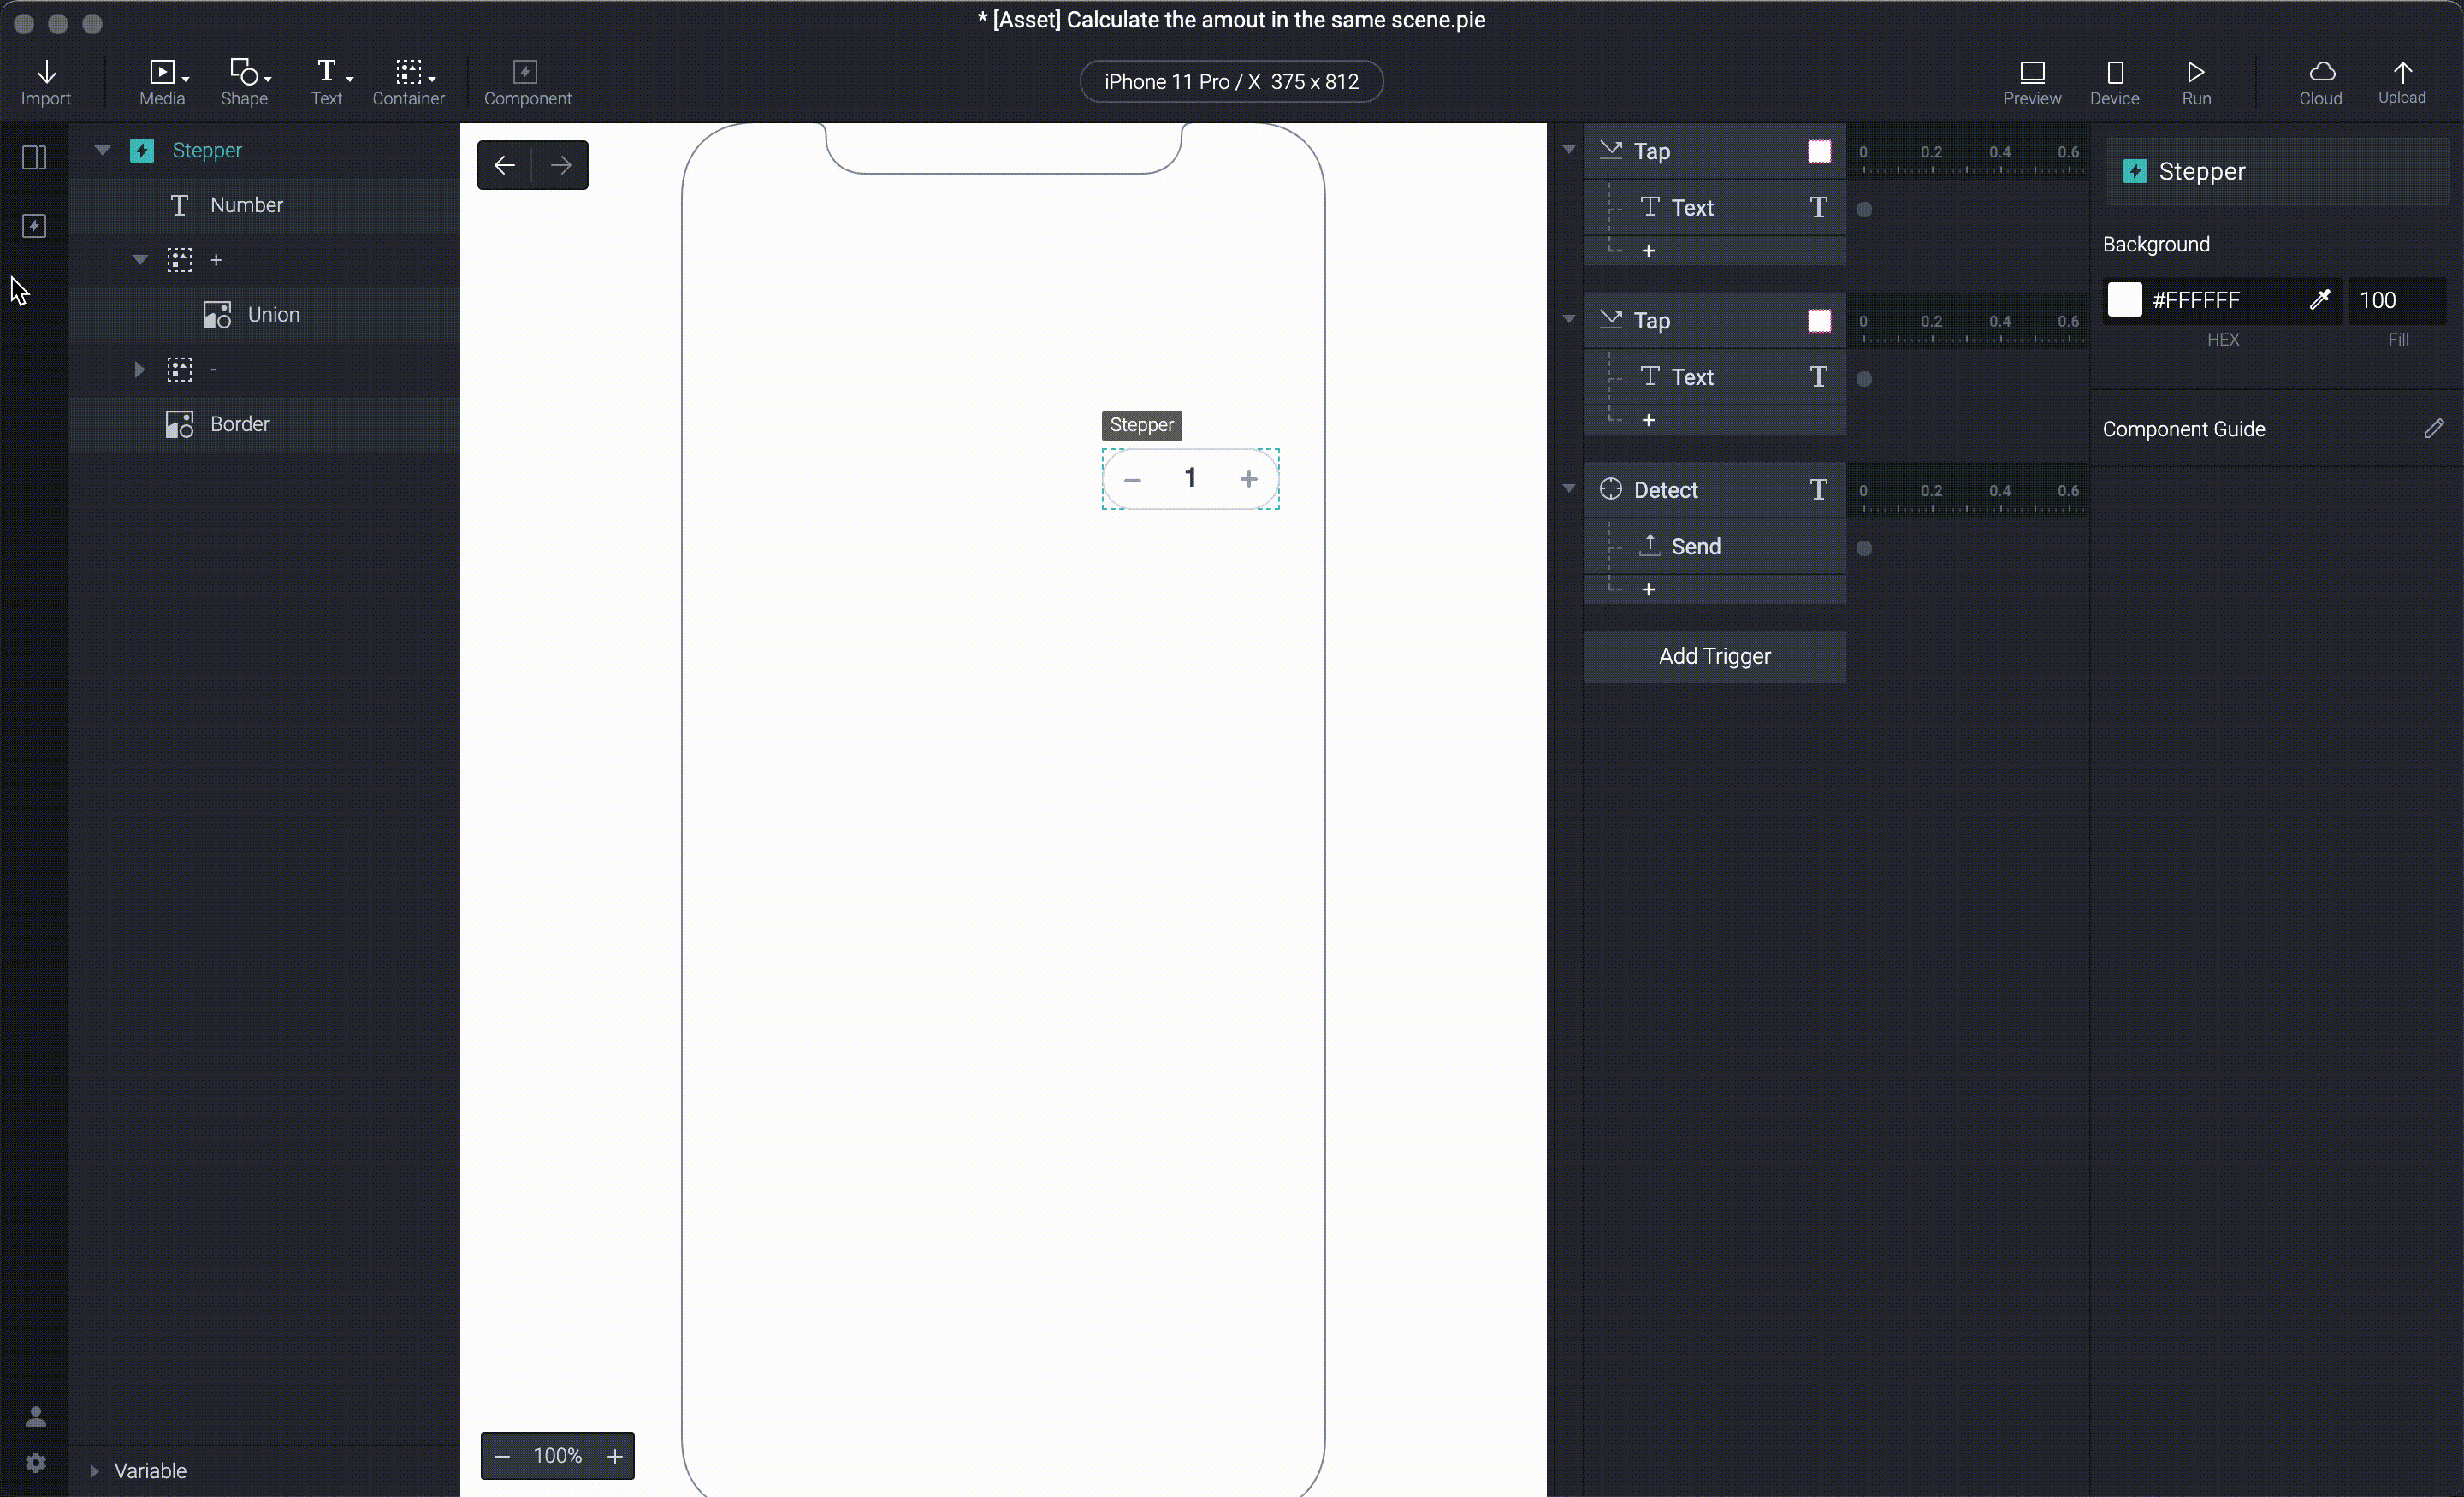
1. Convert interactions into component
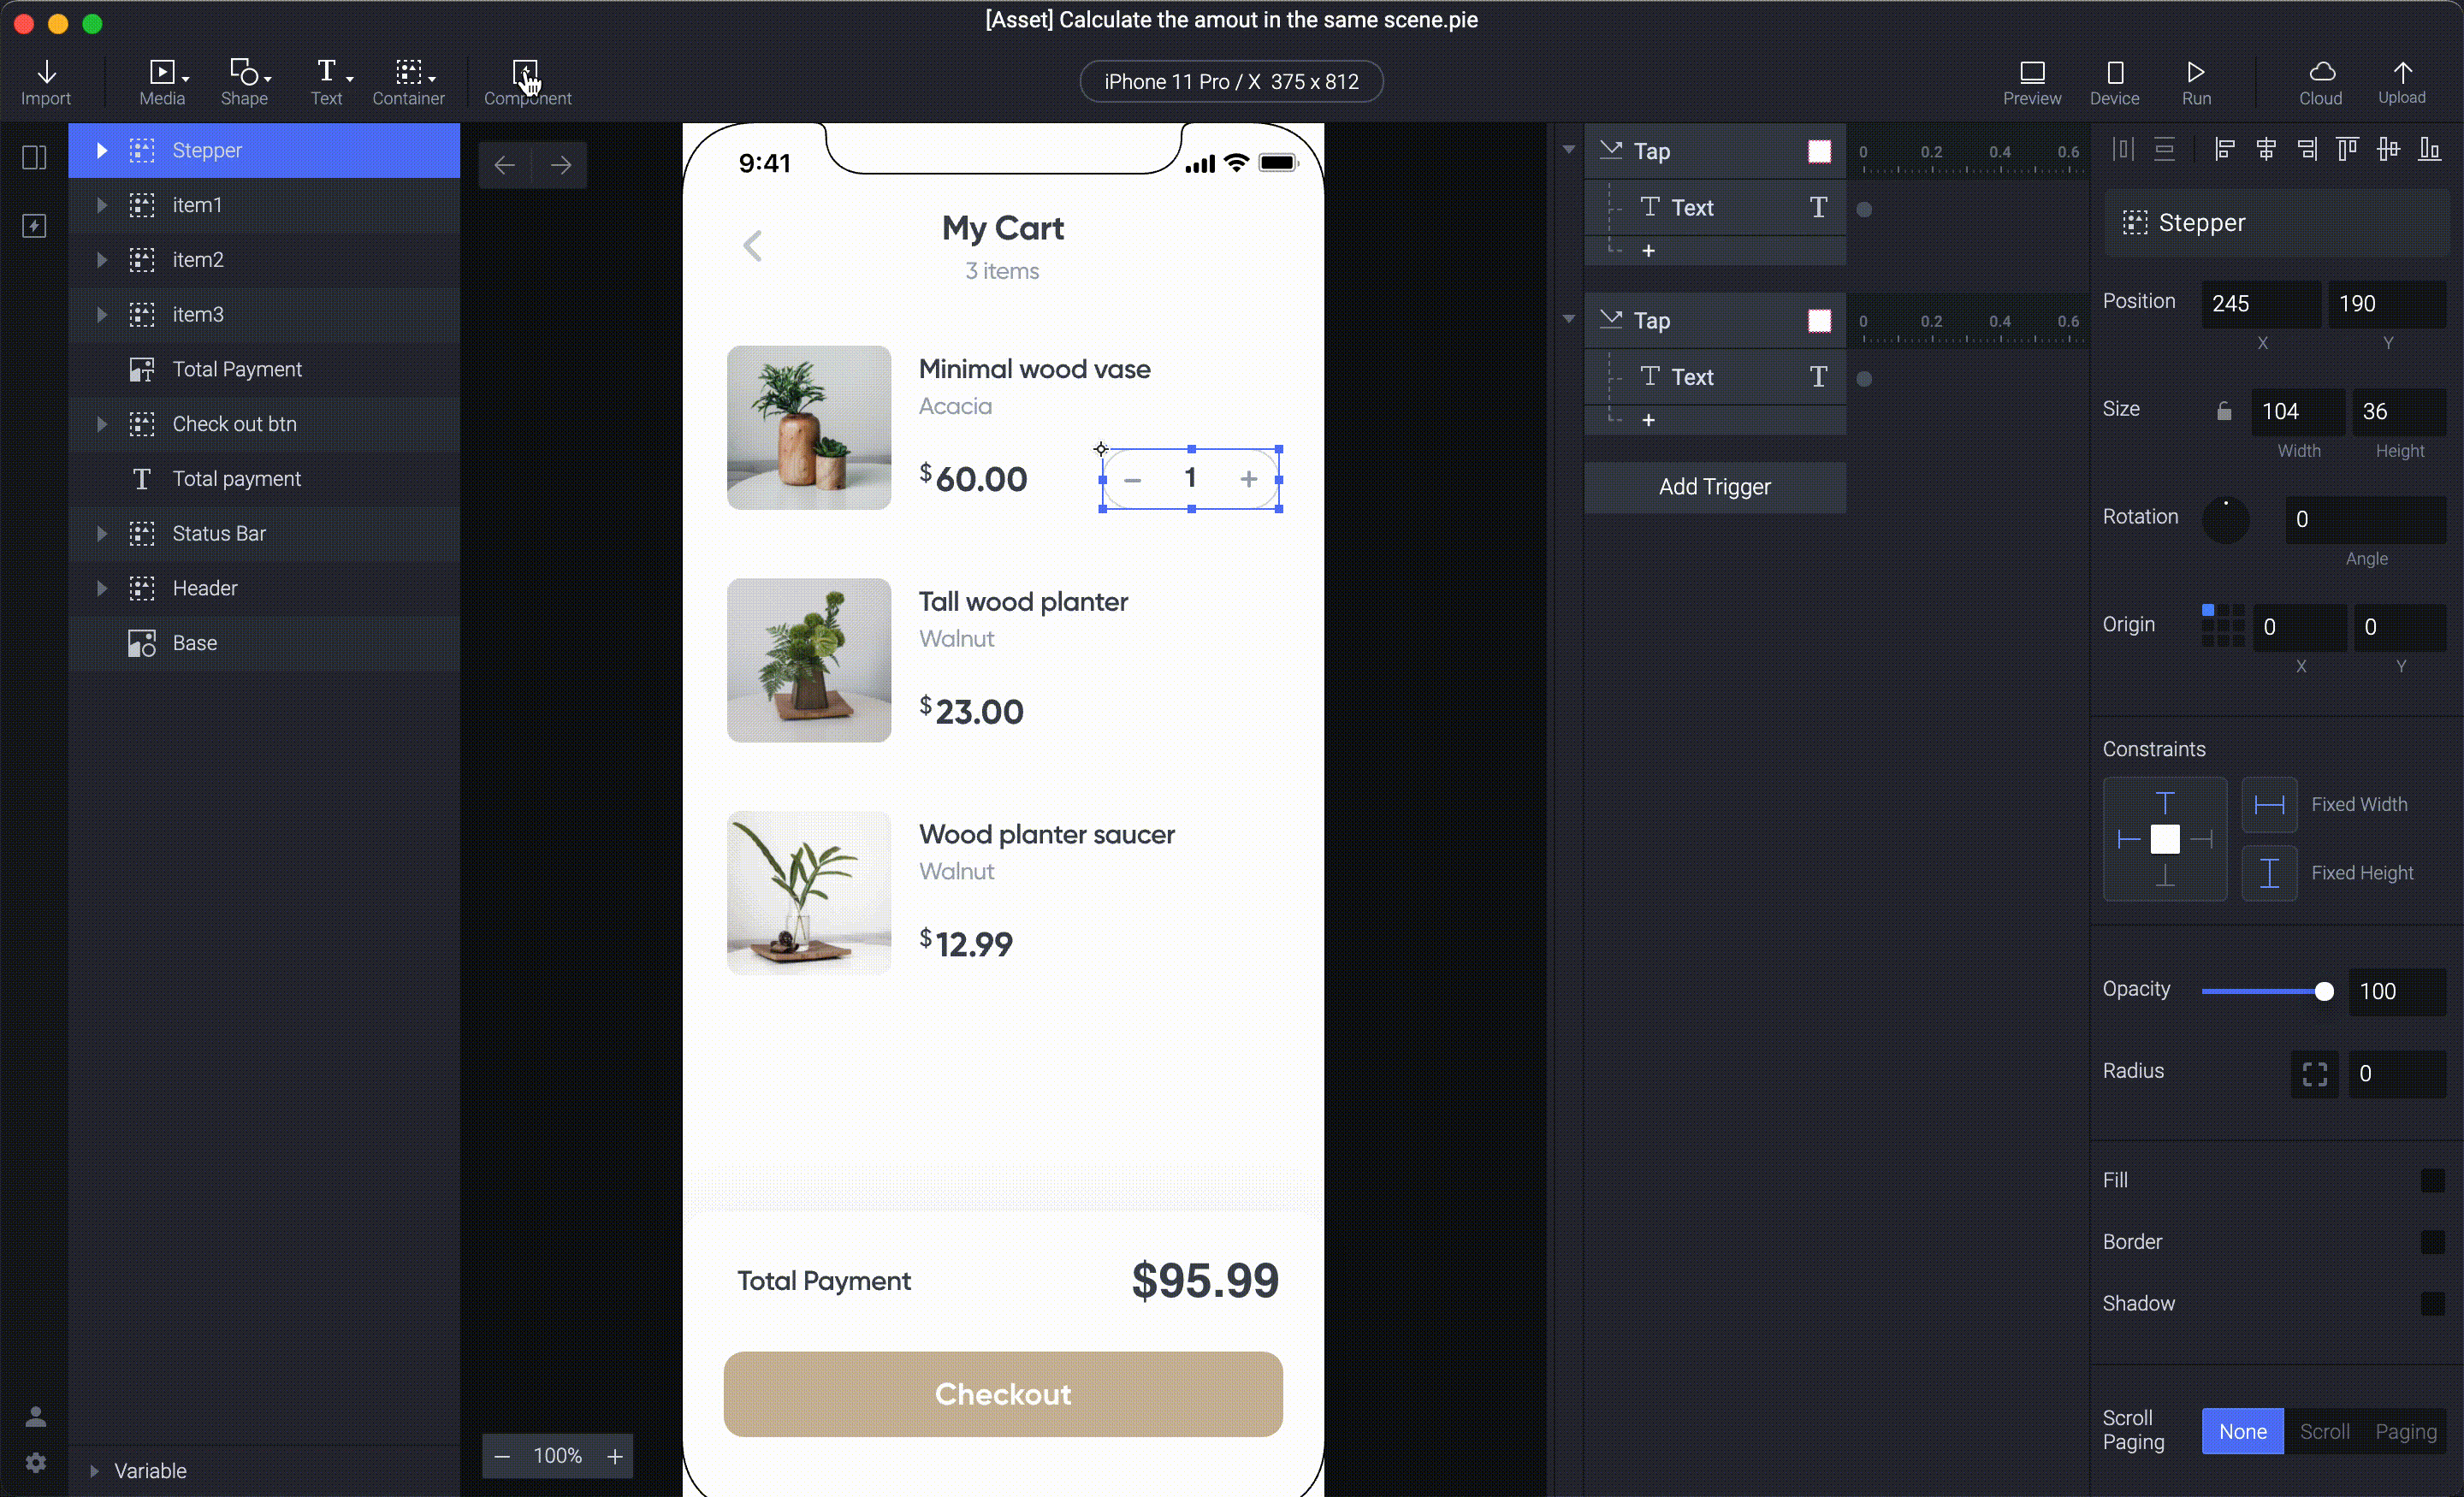
- Select Stepper and click on the Component icon in the toolbar to convert interactions you made into a component.
Components are layer sets with interactions that can be reused across your prototype. This will avoid unnecessary repetitive work and save your time. In this scenario, you can create the stepper component and duplicate its instances on your cart page.
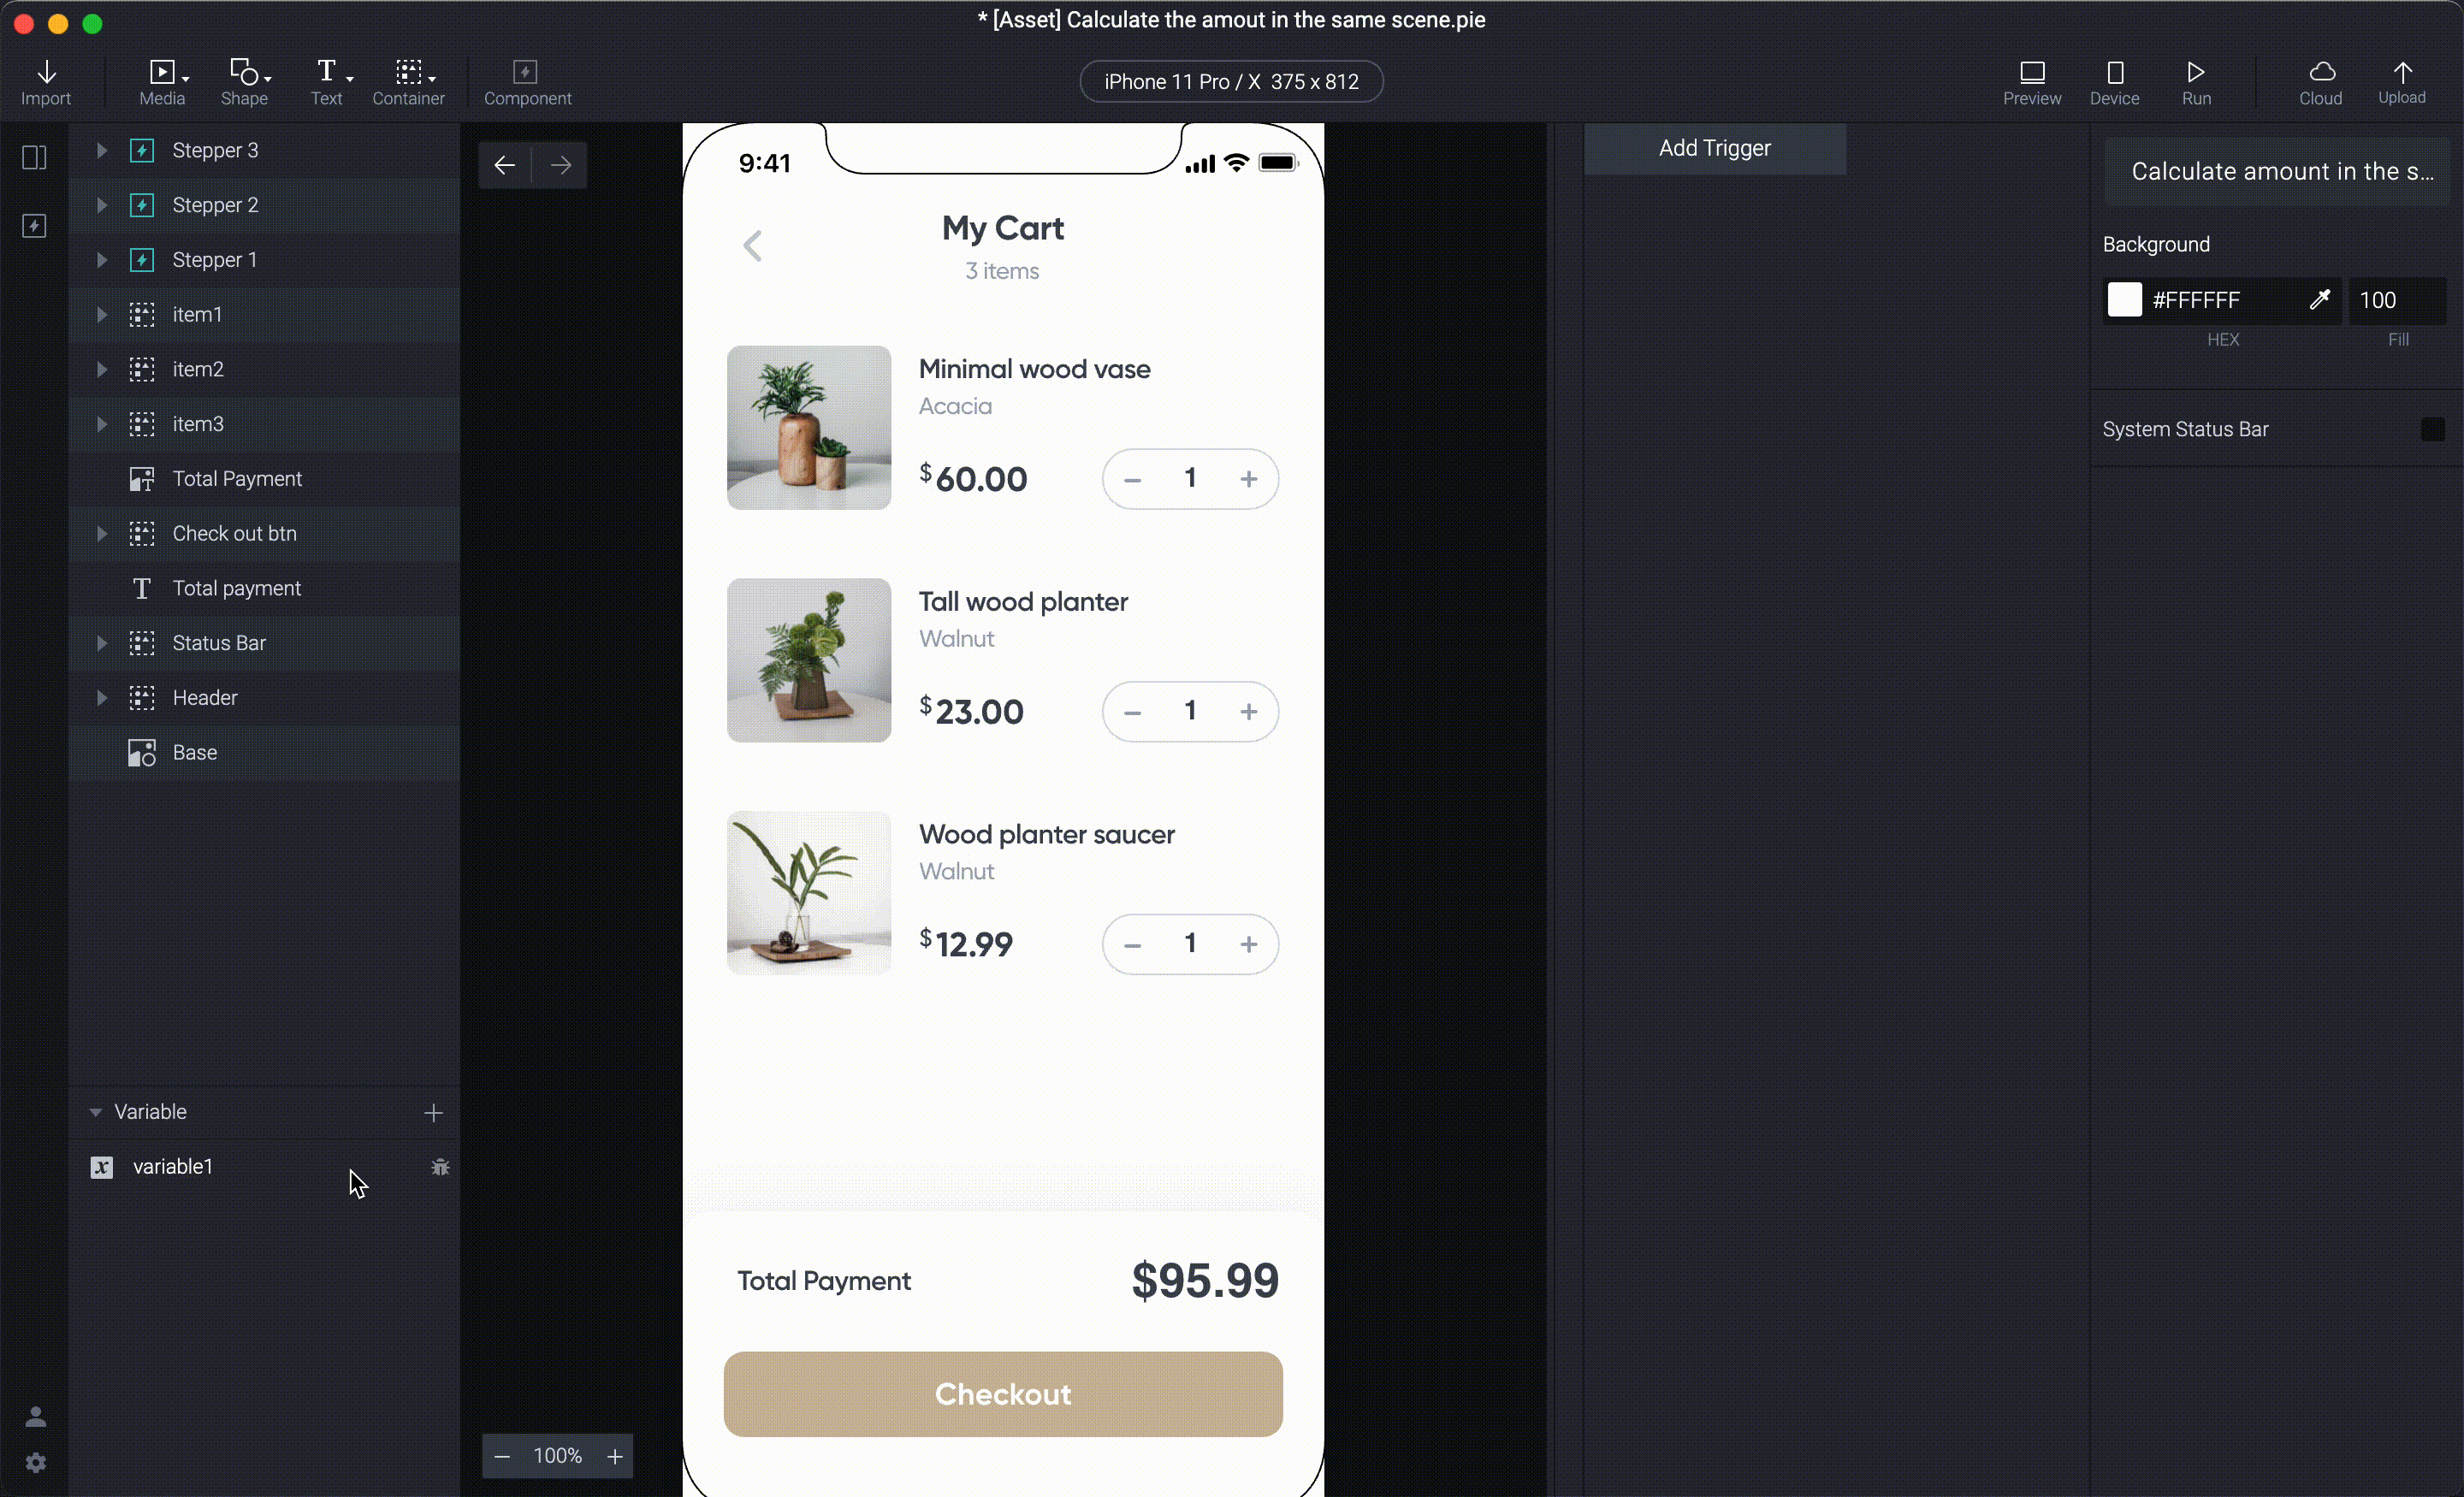
Then duplicate Stepper components on the main scene to the right position for each item.
2. Send the component value to the main component
- Detect is used to trigger a response when the detected value is changed.
In this case, we want a response to be trigger every time the text is changed. So let's add a Detect trigger to the Number layer. In the property, set the panel to detect its Text property.
In this case, we want to have a response whenever Text is changed.
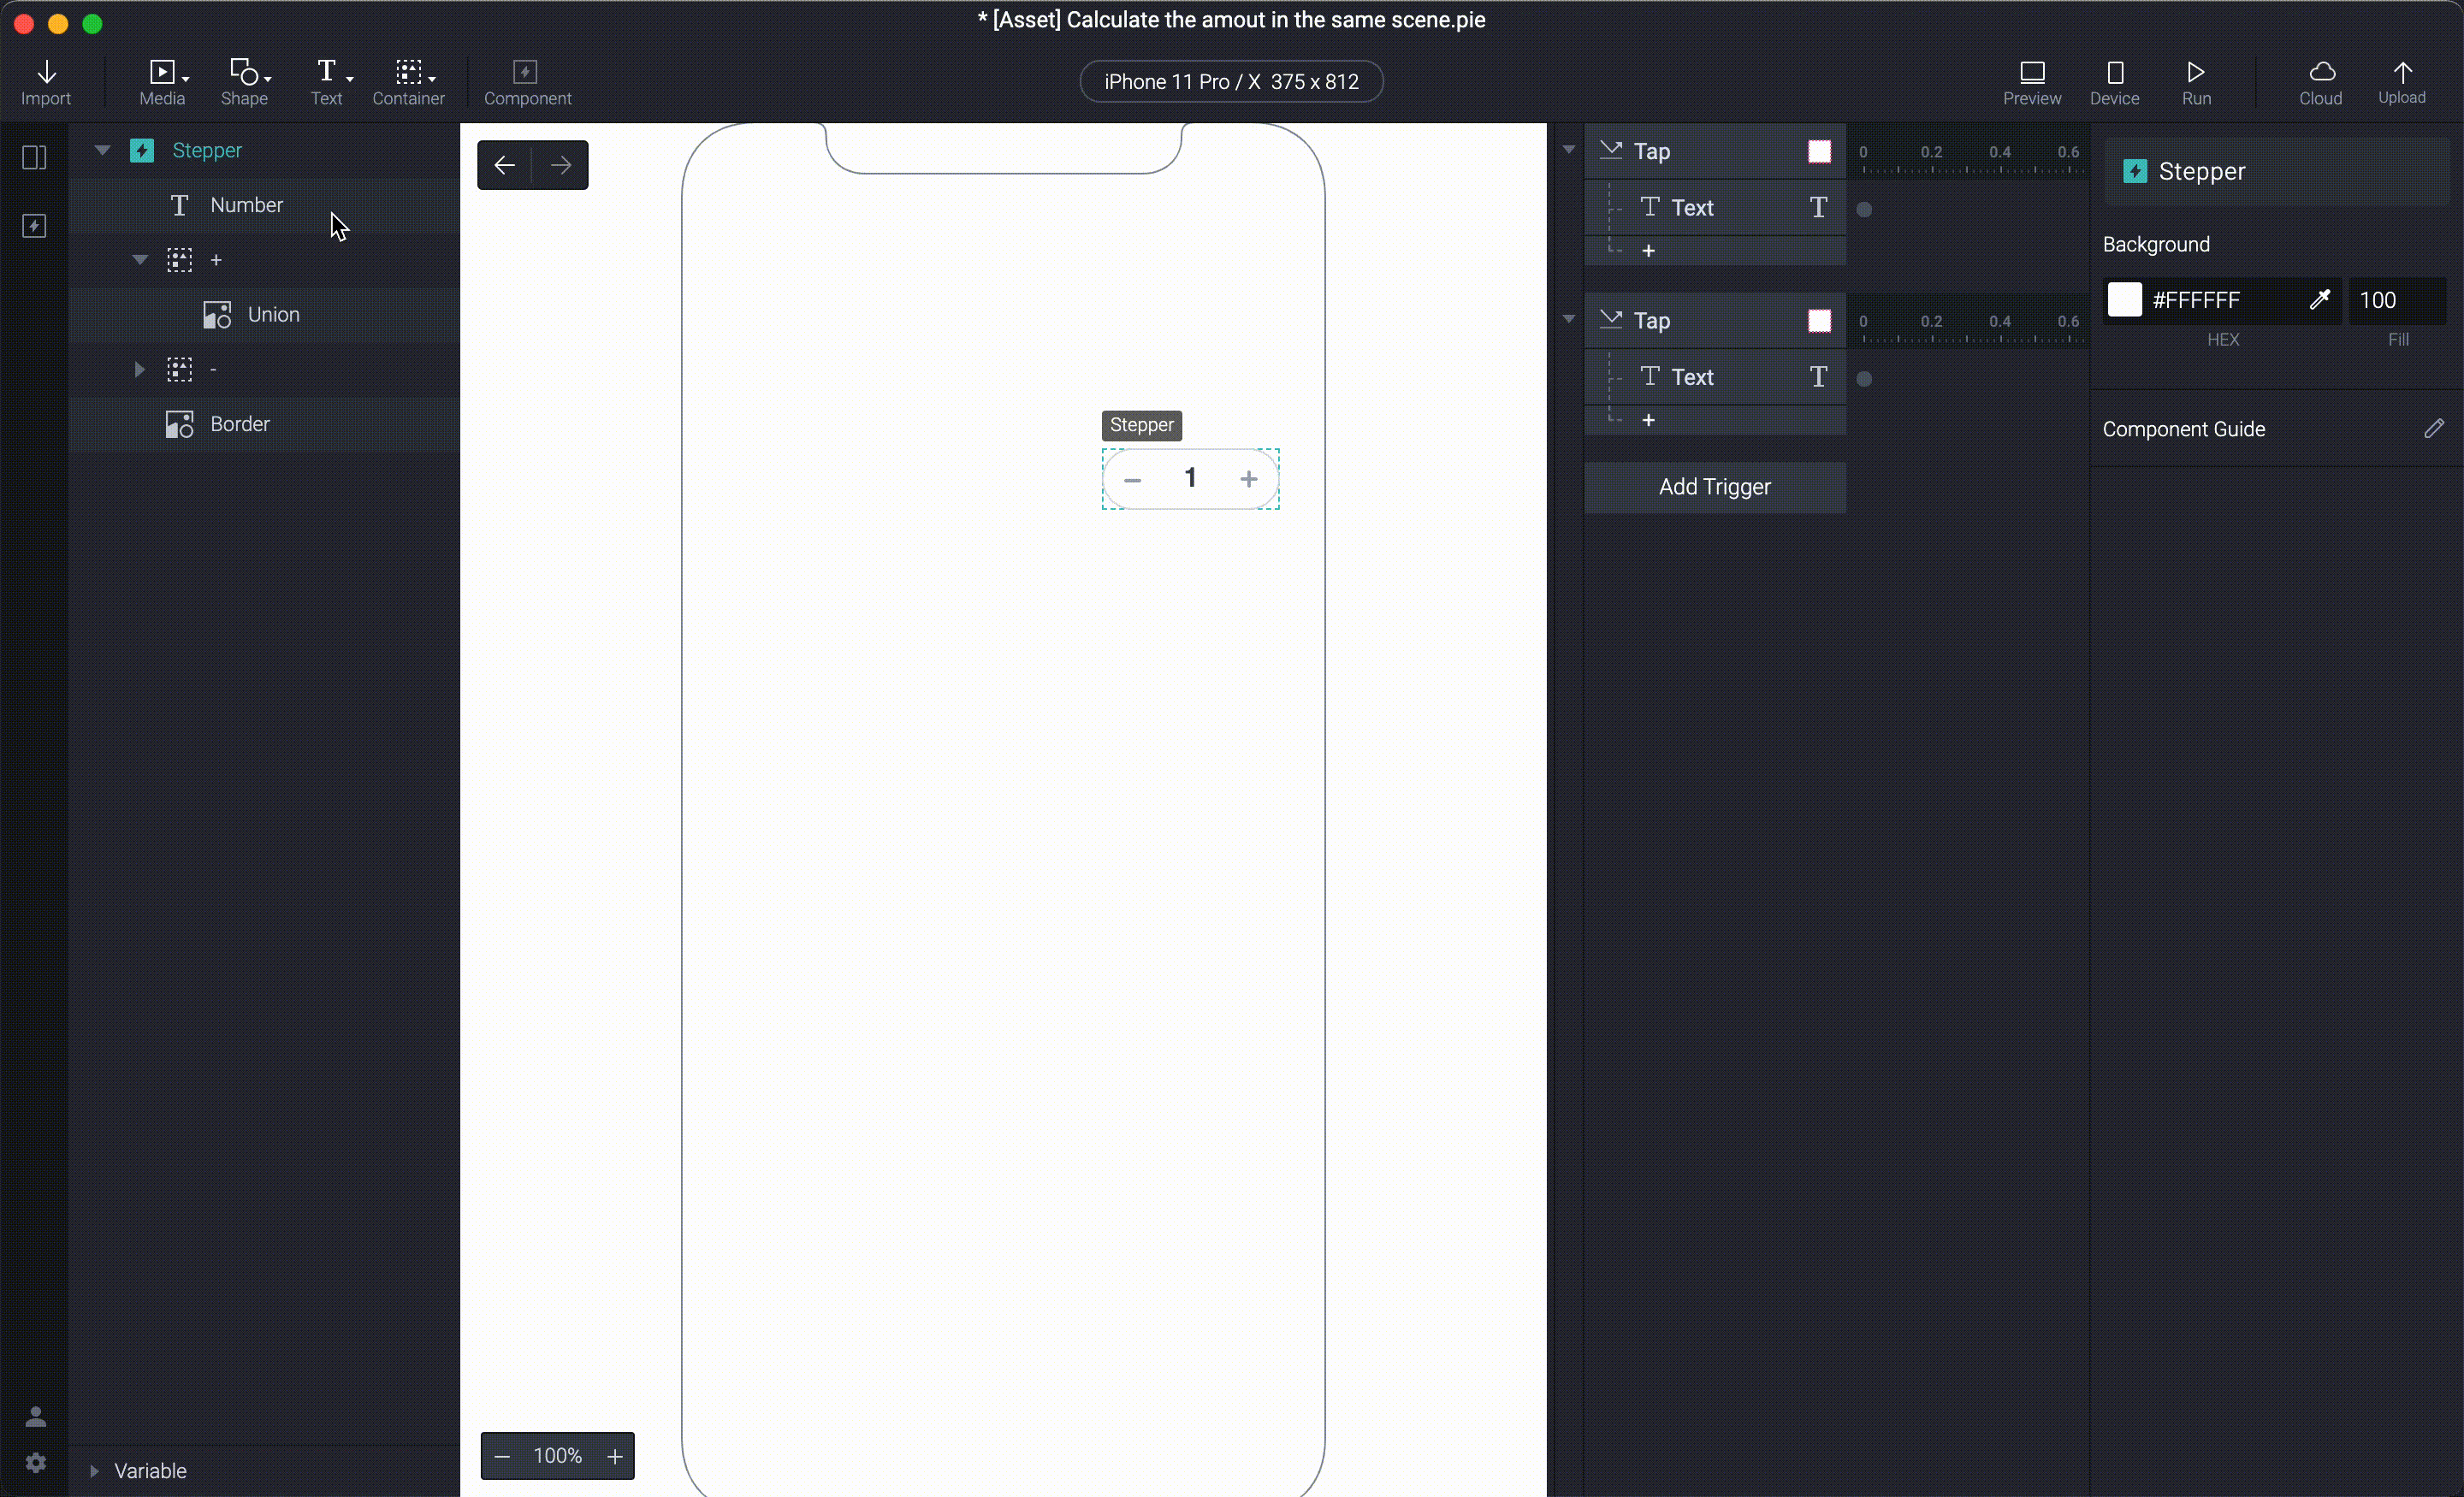
2. Add a Send response inside the Detect trigger. Every time the text changes, the Send triggers.
Choose Send to Parent in the channel section. And give a name to your message.
As our main scene has the Stepper component instances that are dealing with different values, we will use Send to Parent and specify which component we are receiving the message from, to calculate the specific amount associated with that component instance
💡 Channel Explanation (Send to "who")
- Send to Parent: send a message from the component to a parent component or scene when there's no parent component.
- Send to Child Component: send a message from the component to a child component.
- Send to Current Scene: send a message from the component to the scene where the component is used.
- Send to Current Component: This channel allows you to send a message that remains within the component.
When we are dealing with components having the same value or just one component in the scene, we can use Send to Current Scene instead and in that case, we don't need to specify the components, and the message is sent globally to the scene.

number('Number'.text) This formula can convert the text of the Number object into a number which we'll need later on.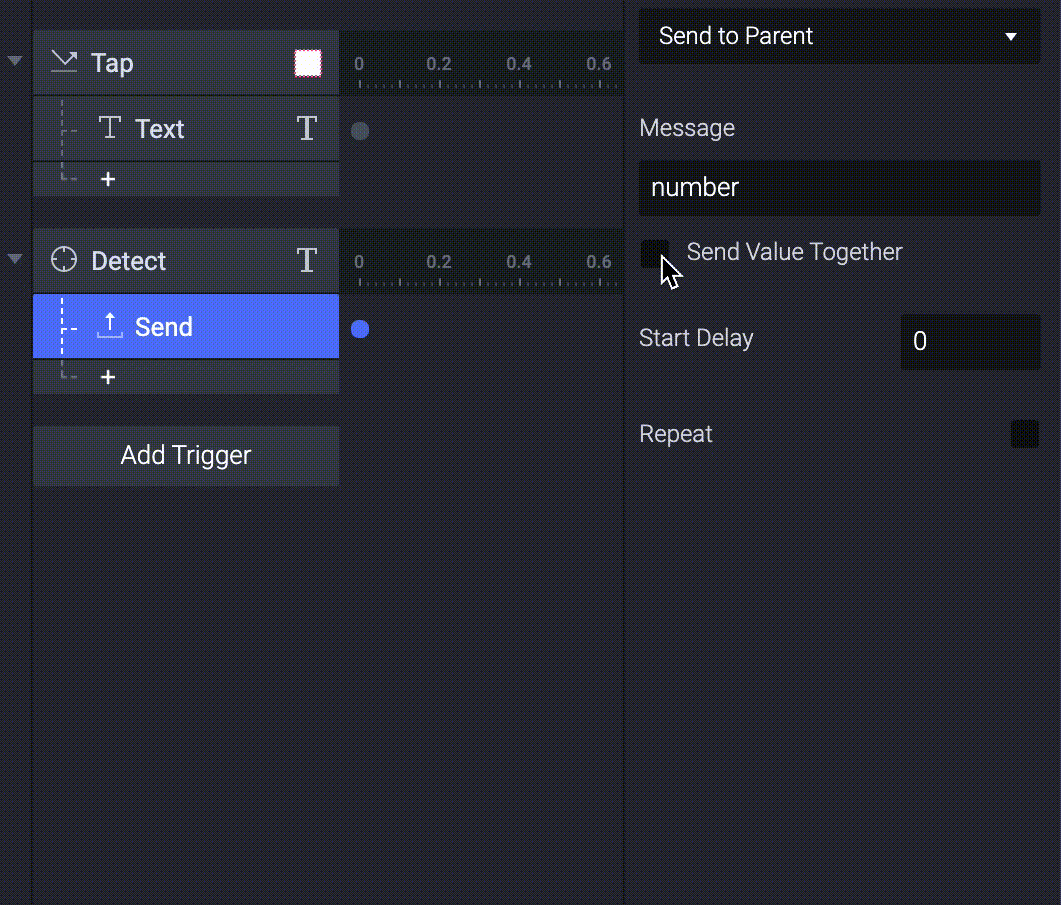
4. Go back to the main scene and create a variable. Set the initial value of your variable to 1 in the property panel to make sure that the variable number and the text number match.
💡 While creating a new variable, we can create it For all scenes or For this scene. In this scenario, both would work. But if we have another scene that also wants to use these variables, use For all scenes.
5. You can check on the bug icon to display the variable in the preview window. This way, you can make sure that your variables are storing the correct values.
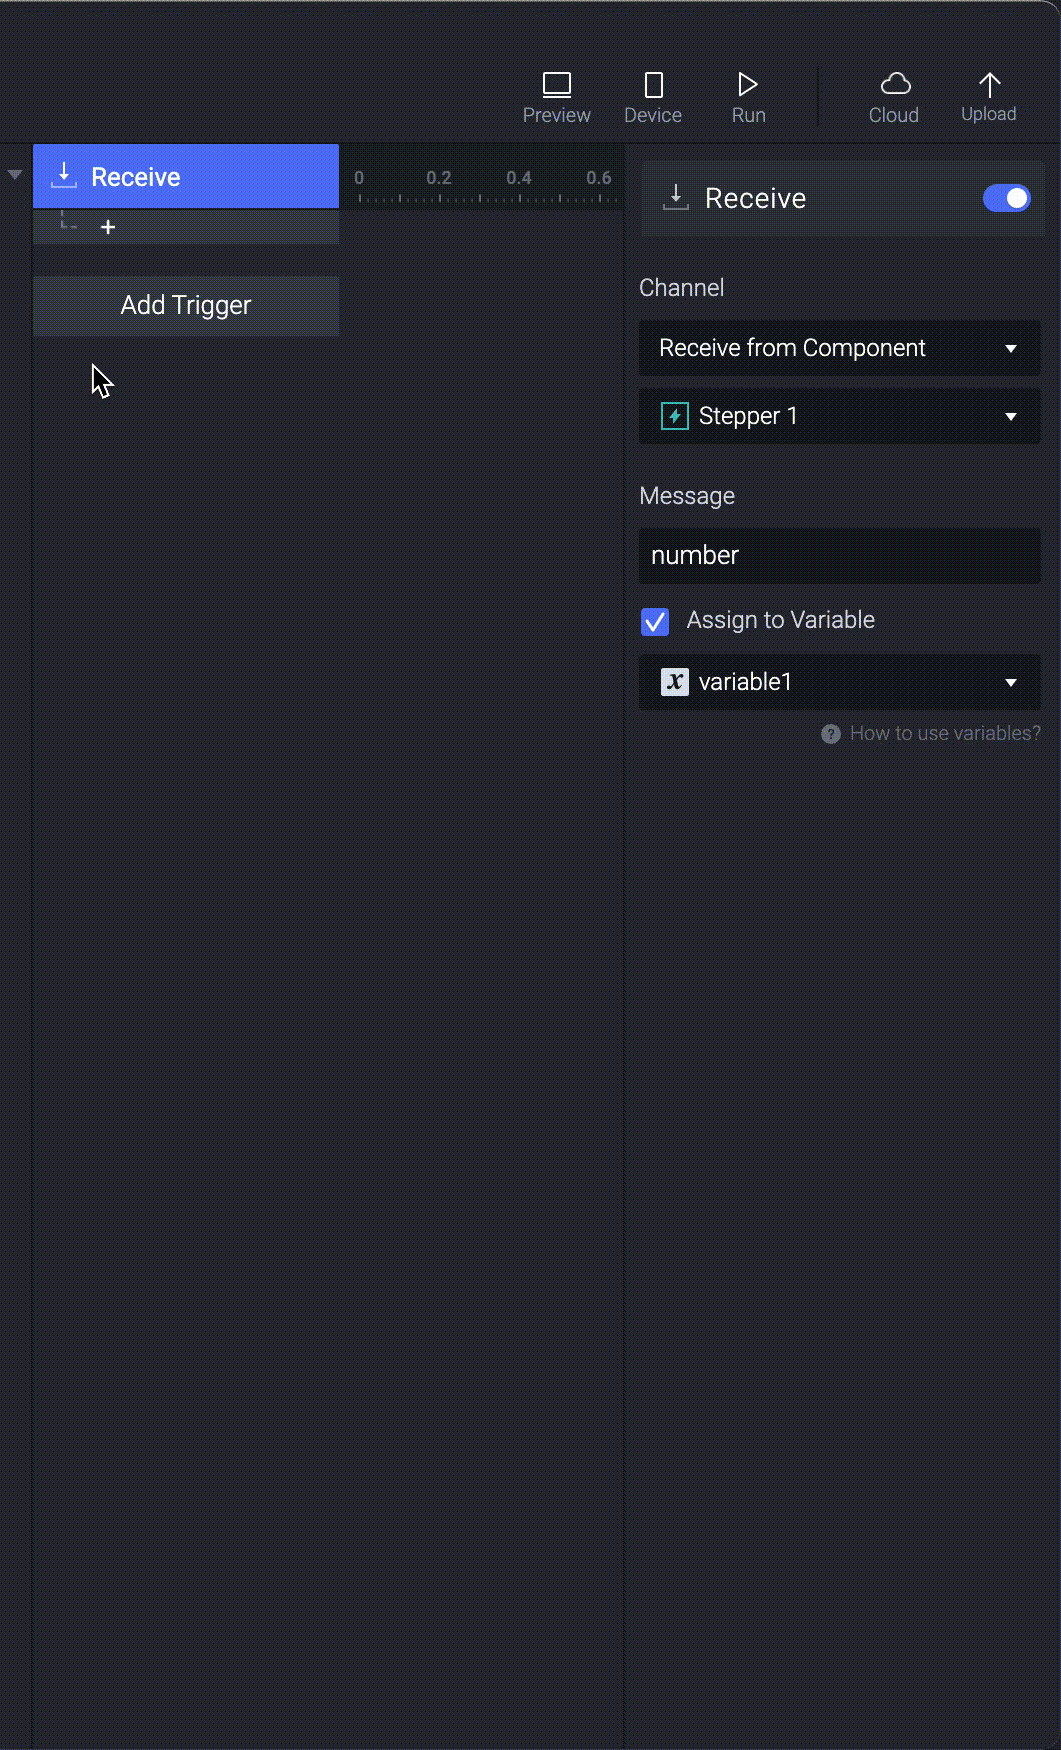
6. Add a Receive response. Choose Receive from Component in the property panel, and select Stepper 1 in the dropdown menu.
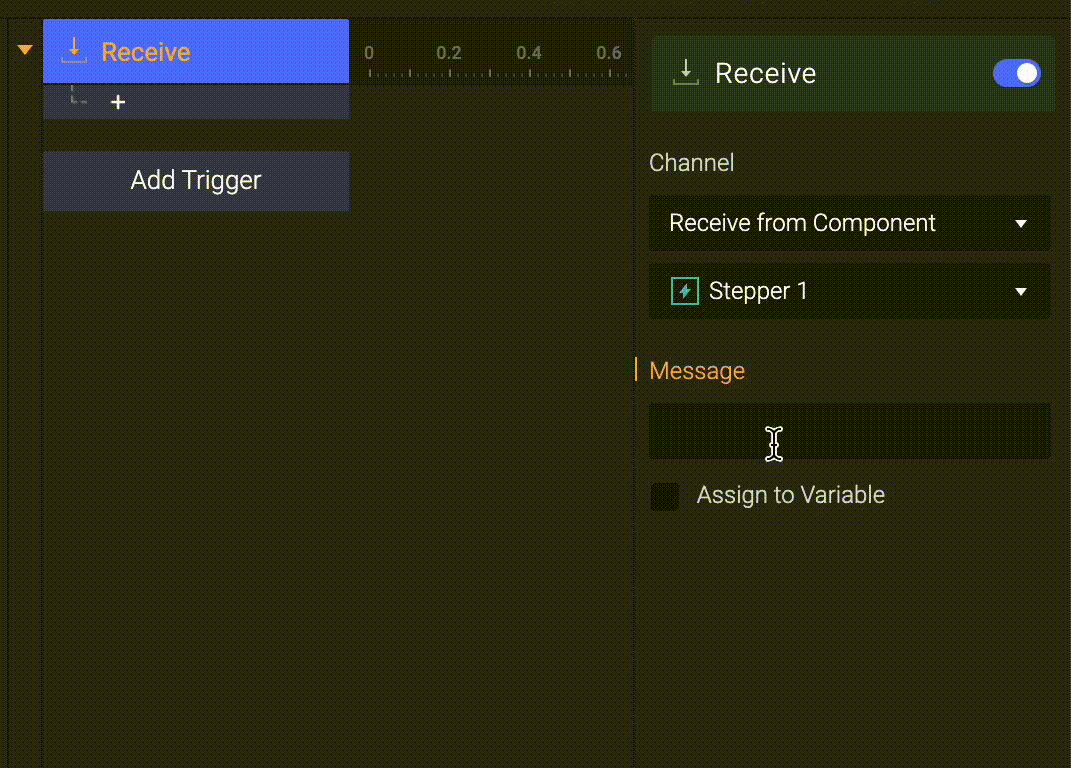
7. Check on Assign to Variable, and choose a variable you want to assign to. This makes variable1 linked with the number on the stepper.
8. When you interact with the stepper on the main scene, the variable changes along with your interactions.
9. Using the same method, now you can store value from all components to variables individually. Create two more variables to do this.
3. Calculate the total amount using a formula
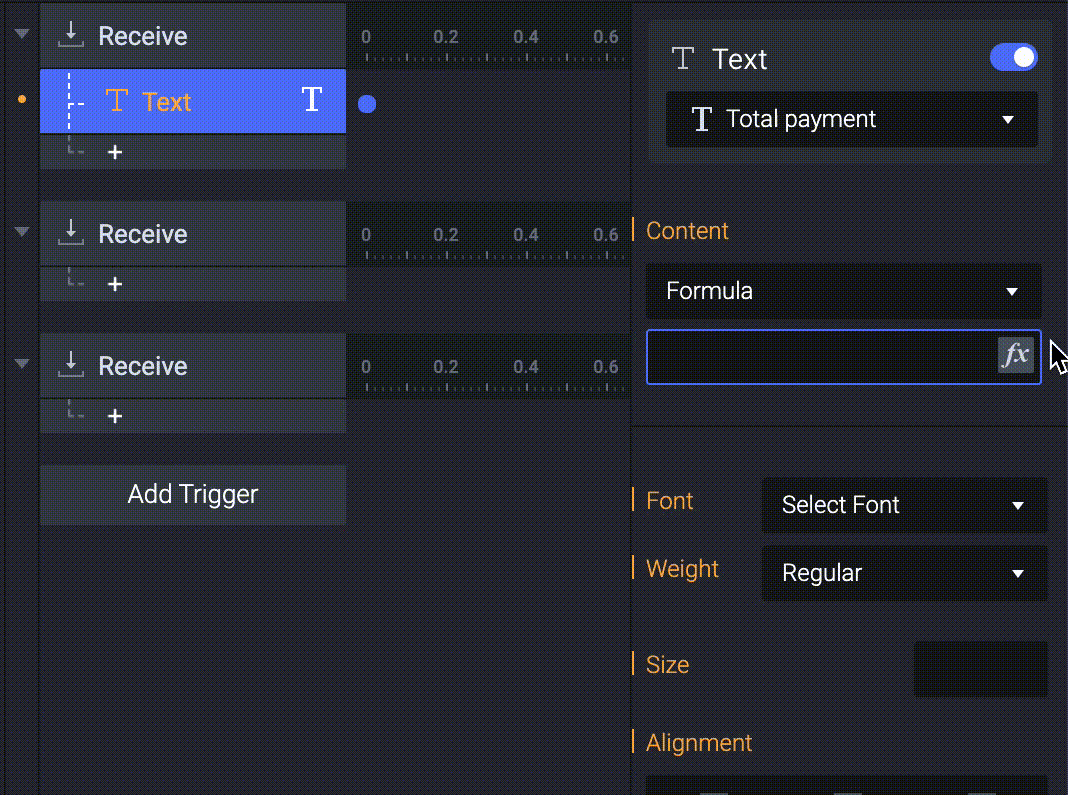
- Select on the Total payment text layer then add a text response under each receive trigger.

2. Choose Formula in the content section.
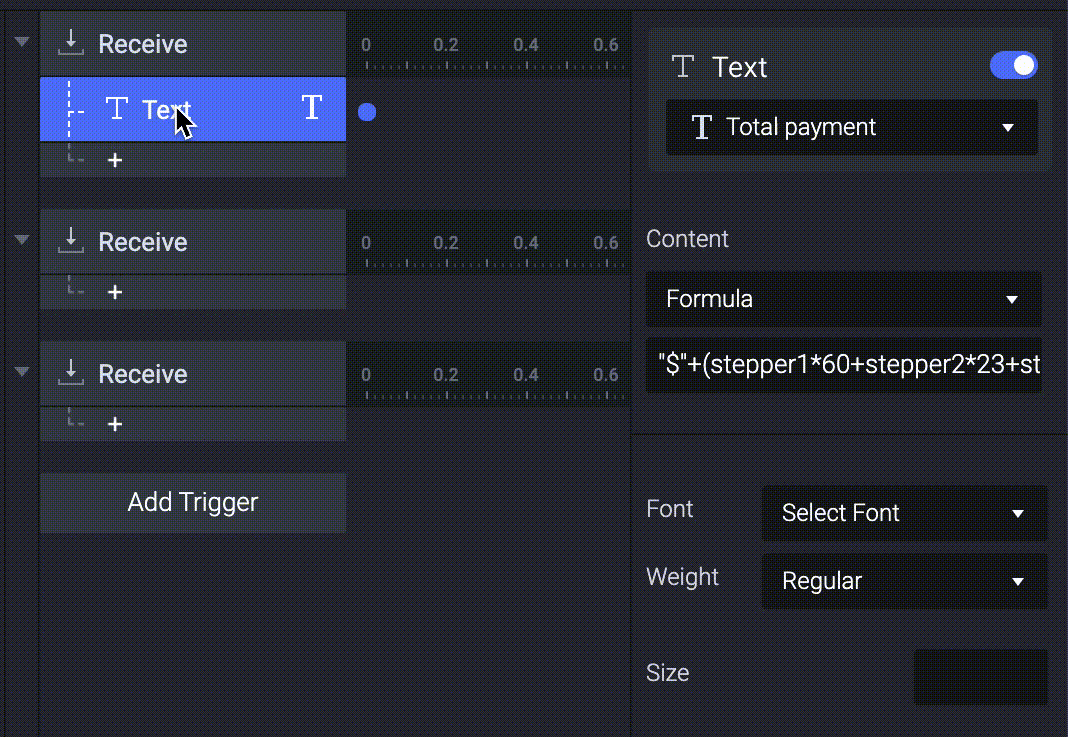
The formula we use here is: "$" + stepper1*60 + stepper2*23 + stepper3*12.99
This formula calculates the total payment value and also a $ symbol before this value.
3. Add the same response to each trigger
Congratulations!
That's it. Now you know how to update the shopping cart for an e-commerce app using components.
Did this use case tutorial help you? Take part in this 1-min survey to help us to improve our educational content.

.jpg?fm=webp)
